

Manage Users
On the Services ribbon: Select System | Administration | Manage Users to manage user accounts. User permissions (and roles) will determine which Pitram Portal services a user has access to.

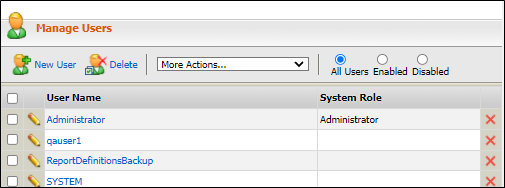
The Manager Users screen is displayed:
Only those with Administrator privileges can work in Manage Users.
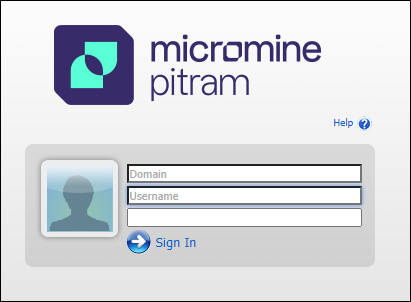
Domain
If required, enter the Domain name for your Windows login.
Depending on the system configuration, you may not need to enter a Domain name.
Username
Enter your Username. The roles that have been assigned to you and the services you have permission to access, are associated with your Username.
The Username is not case sensitive.
Password
Enter your Password.
Passwords are case sensitive so you must match the case for the stored password exactly. You will be warned if you have the caps lock key is on.
User Name
Select the check boxes to either delete those users, or perform one of the actions listed in the More Actions drop-down menu.
New User
Click here to add a new user.
Delete
Click Delete to delete the selected users.
More Actions
A drop-down menu provides the following options:
-
Grant Administrator Role
Grant this role to the selected user names.
-
Revoke Administrator Role
Revoke Administrator privileges for the selected user names.
-
Disable Account
Make the selected user names temporarily unavailable or inactive.
-
Enable Account
Enable the selected user names (i.e. make active) that were disabled.
-
Clear Cache
Clear all temporary files and memory allocations of selected users. Clearing the cache may help to improve performance. If problems persist, speak to your Administrator.
All Users
Select to display all the users currently defined.
Enabled
Select to display only those user names that are active.
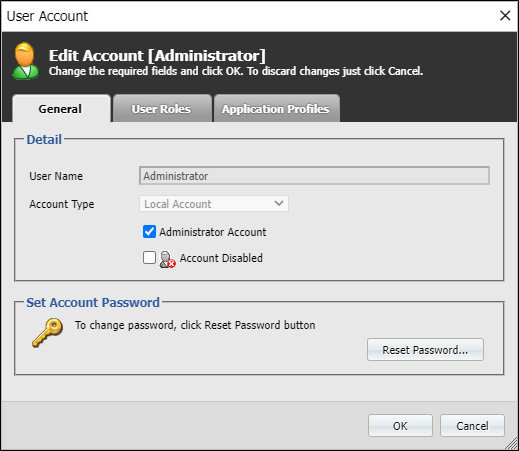
Both Enable and Disable can be set on the General tab of a user name.
Disabled
Select to display only those user names that are disabled or inactive.
Set Account Password
Click the Reset Password button. The Reset Password dialog is displayed:
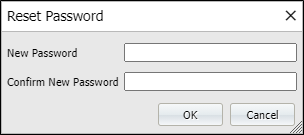
Enter the new password twice, then click OK.
Add a new user name
To define a new user name:
- Click the New User button. The dialog opens.
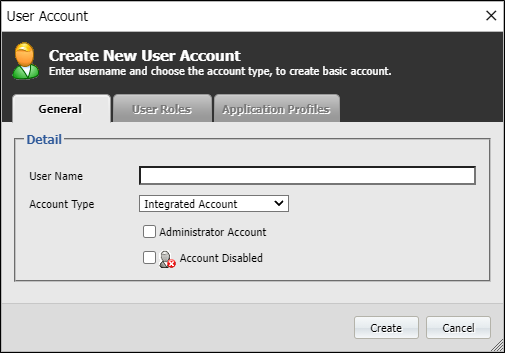
- On the General tab, enter or select the following:
Option Select User Name UserName1 Account Type Integrated Account There are two types of accounts:
- Integrated Account. With this type of account, the user must enter the following to sign in:
- Domain name.
- user name.
- Password.
- Local Account. With this type of account, the user must enter the following to sign in:
- user name.
- Password.
Administrator Account Select if the new user is to have Administrator privileges which will give them access to all Pitram Portal services. Account Disabled Select if a user name is to be made inactive. If Disabled or inactive, it can be enabled at a later date. An integrated account means that a user can integrate their Pitram Portal sign in account with their Windows login. They will then have access to Windows services and network connections.
- Integrated Account. With this type of account, the user must enter the following to sign in:
- The User Roles and Application Profiles tabs are not available at this time. A User Role is defined for the new user name when you add roles to the user name. Application Profiles are defined by the system.
- Click Create to save the new user name.