

General Configuration
On the Services ribbon: Select Administration > General Configuration to manage administration and advanced server settings.

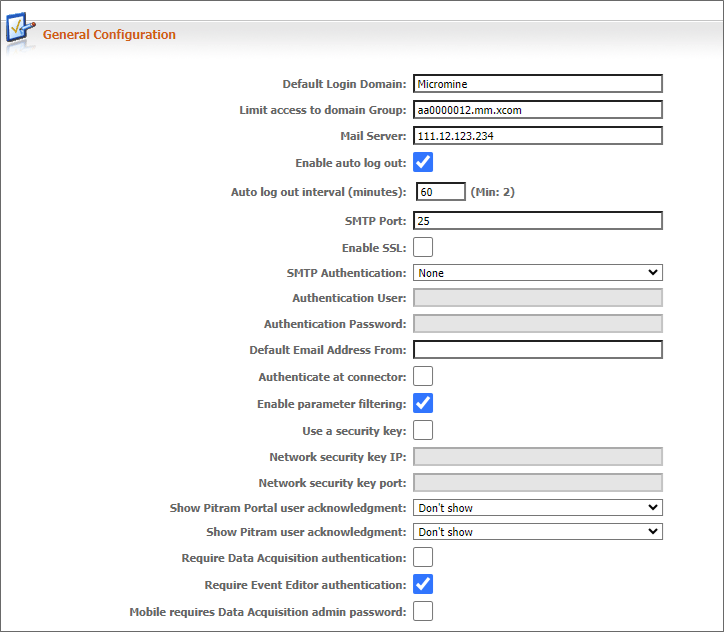
The workspace displays the following General Settings, User Account Settings and Pitram Licence Service settings:
| Option | Description |
|---|---|
| Default Login Domain | Enter your Windows domain name. |
| Limit access to domain group | Restrict access to the defined domain group. |
| Mail Server | The Mail Server location is referenced by the Pitram Portal application. This allows for generated reports to be distributed quickly and easily to other users. |
| Enable Auto Log Out | Select the option to activate the Auto Log Out function, which will apply the interval specified. |
| Auto log out interval (minutes) | Following a specified period of inactivity, it may be desirable to perform an automatic log out. In order to resume work in the Pitram Portal, you are required to log back in. Any parameter or option selections that were made during the previous session will be lost. |
| SMTP Port | Specify the port number for SMTP. |
| Enable SSL | Select the option to enable communication using the Secure Sockets Layer security standard (https). |
| SMTP Authentication |
Specify whether the connection to the Mail server should be authenticated. The options are:
|
| Default Email Address From | Define the senders email address. This is the email address to which the recipient of the email can respond. |
| Authenticate at connector | Select this option to verify login details at the Connector level, rather than at the Pitram Portal server level. |
| Enable parameter filtering | This option is selected by default, indicating that the system tables are maintained by the server. You might want to clear this option if disk space is an issue, as the tables needed for parameter filtering can use a considerable amount of disk space. |
| Use a security key |
If selected, enter either the:
|
| Acknowledgements |
Choose whether to show acknowledgements (Never, Once, Always) for:
|
| Authentication |
Choose whether authentication is required for:
|
User Account Settings
The workspace displays the following User Account Settings:
| Option | Description |
|---|---|
| Failed Logins | Enter the number of failed login attempts allowed before an account is disabled. 0 to disable. |
| Account Inactive | Enter the number of consecutive inactive days before an account is disabled on login. 0 to disable. |
| Multiple Sessions | Select the check box to allow multiple sessions per user. |
| Local User Accounts | Select the check box to disable the creation of new local accounts. |

Pitram Licence Service
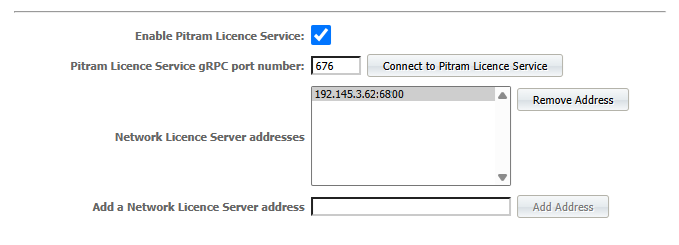
The workspace displays the following Pitram Licence Service settings:
| Option | Description |
|---|---|
| Enable Pitram Licence Service |
Select the check box to enable the Pitram Licence Service. This will enable the following options: |
| Pitram Licence Server WCF Port Number | Enter the required WCF port for the Pitram Licence Server. Click the Connect to Pitram Licence Service to connect to PLS on the selected port. |
| Network Licence Server Address | Displays the IP address of the Micromine Network Licence Server. You can remove an address using the Remove Address button. |
| Add a Network Licence Server Address |
Used to enter an IP address for MNLS to be added using the Add Address button. |
Save
When you have finished entering the configuration settings, click Save.