Pitram Mobile & Vision Setup
The purpose of this
Pre-requisites
Hardware
The hardware needed to run Pitram Mobile should include:
- Trek 773 unit
- Axis Encoder
- Ethernet cables x3
- Ethernet power adapter
- USB – USB connector cable
- High density connector cables
- Camera
- Relevant Camera cables to connect to unit
- USB Hub (4x slots)
- Cable to connect USB Hub and the USB connector slot on Trek Unit
Software
The Trek 773 unit has a fresh or working image. See How to reimage the unit (mostly for Internal use) below.
The Trek 773 unit has a working copy of Windows 10 (see Windows Setup Settings (mostly for Internal use) below.
How to reimage the unit (mostly for Internal use)
- Have a fresh image available on USB.
- Have disk imaging software Ghost available on USB.
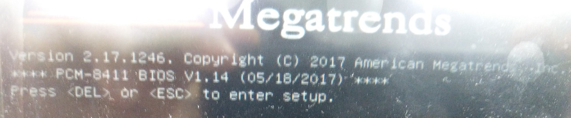
- Boot-up the unit and enter BIOS (press ESC on boot-up).
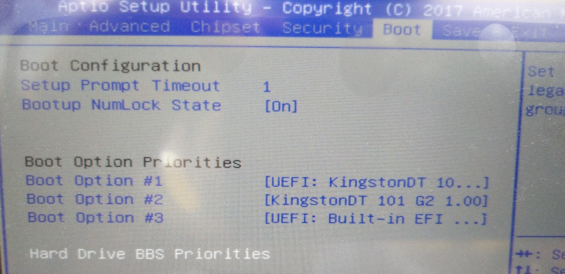
- Set the boot priority to boot from USB with Ghost software.
- Save your changes and restart.
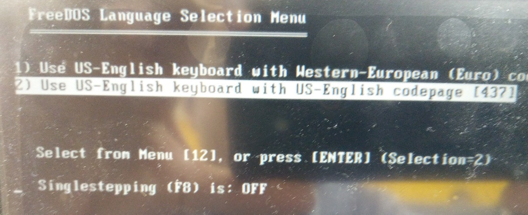
- Select 1 or 2 on the Language Selection prompt.
- Type ‘ghost’ on prompt.
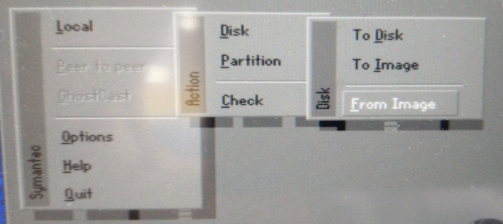
- Select Local | Disk | From Image:
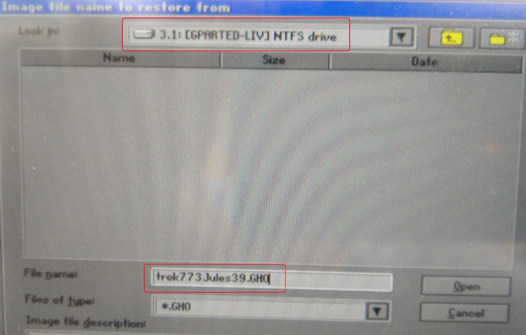
- Select the USB drive with the image using the tab keys on the keyboard and enter the image file name manually (this is because Ghost cannot display files even if it exists):
-
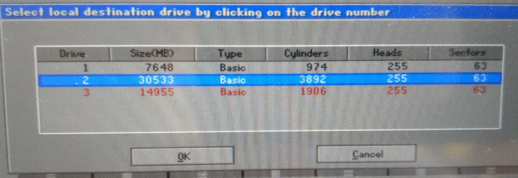
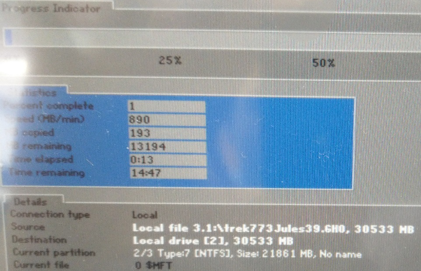
Select the appropriate drive, click OK and begin the restore.
- Click OK.
- Unplug the USB sticks when the Trek restarts.

Windows Setup Settings (mostly for Internal use)
- Select the preferred Language/Country/Region/Time Zone.
- Setup your Wireless network settings.
For ease of use, use Express Settings.
- Select Azure local account and then select Create a local account at the bottom.
- Create an account with Username/Password: Pitram/mmpitram
Installing and Updating Pitram Vision and Mobile Software
Initial Login and Mobile Installation Setup
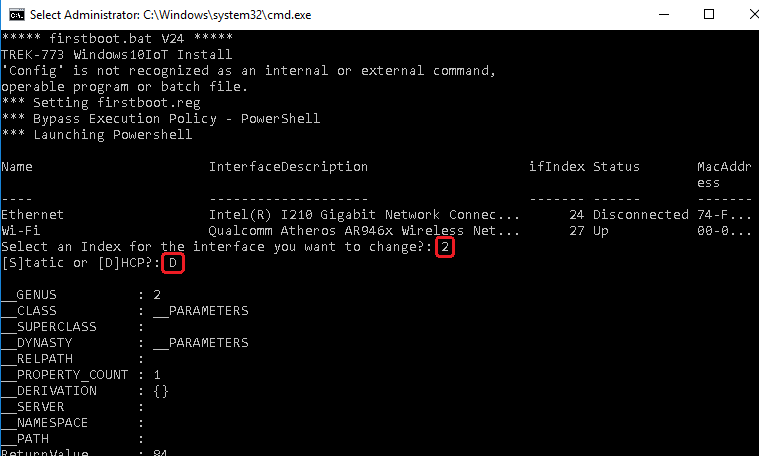
- A script should auto-run on the first login to Windows. This script will install Pitram Mobile, as well as setting necessary machine settings. The prompts should look something like this:
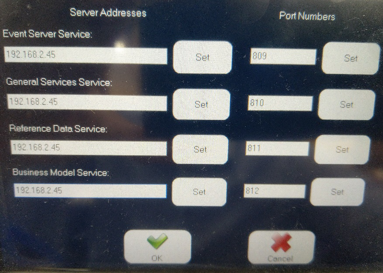
- On first start-up of the Pitram Mobile software, you will be prompted to set the IP address for your servers. Set the IP to the IP of wherever your servers are being run. For example:
- Confirm that Mobile can start successfully and receive both Reference Data and Client Data.
- Confirm in the Event Editor that events are flowing in from Mobile by testing a few settings in Mobile.
- Disable UWF Filtering:
- Go to Command Prompt and type: ‘Uwfmgr.exe filter disable’.
- Restart.
Install the Pitram Vision Service
- Run PitramVisionSetup.exe.
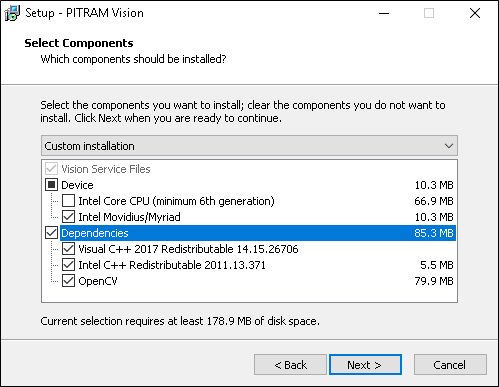
- Ensure Dependencies and Movidius options are selected:
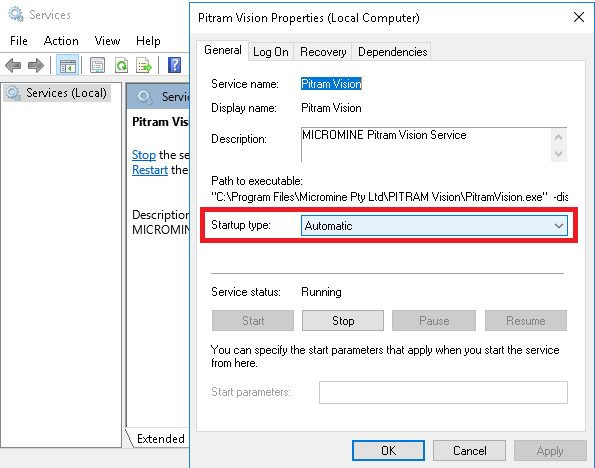
- Go to Services (Windows Key + R, type “Services.msc”).
- Find the service PitramVision, right click and select Properties.
- Set the service to start-up automatically:
(For internal use, setup files are located here:) \\mm00832\Releases\Pitram
Update Pitram Mobile
- To install the latest version of Mobile, run your new PitramMobile.exe version installer.
- Confirm the version upgrade on the Installation screen menu.
- Restart.
(For internal use, setup file are located here:) \\mm00832\Releases\Pitram
Camera Settings: Desktop Setup
- Download the Axis IP Utility software from the Axis website:
- Ensure that the camera is plugged in, connected and powered.
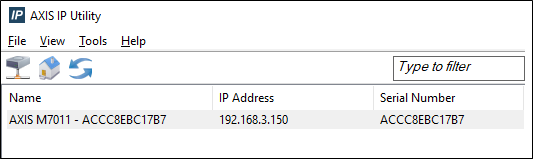
- Check that the camera hardware is connected and visible on the network using the Axis IP Utility:
- Right-click on Camera and choose View Home Page on the Home page, login prompt: root/micromine
- Confirm that the camera live-stream works.
https://www.axis.com/en-au/support/downloads