

Pitram Vision Installation
Hardware Components
Pitram Vision requires hardware components to be correctly installed and configured. For example:
- An analogue camera - usually this component does not need to be configured. However, it is important to correctly position and connect the device to a power and video encoder.
- An analogue to digital network video encoder - converts analogue input to digital format and makes it available on network. For the device to work correctly, it usually requires network and video configuration. Models verified to work with Pitram Vision:
- A Tensor processing unit. This is an AI accelerator application-specific integrated circuit (ASIC) developed specifically for neural network machine learning. Models verified to work correctly with Pitram Vision:
Axis M7011: Documentation and Manual.
Intel Movidius Neural Compute Stick:- Documentation and Manual.
The device should be automatically detected in Windows 10 x64 and with Windows drivers installed (described below). The software drivers (hardware specific DLLs) can be installed during the installation of the Pitram Vision service.
Hardware Configuration
The following example describes the configuration process of Camera Ball IP69K Heavy Duty, Axis M7011 video encoder and Intel Movidius Neural Compute Stick.
- Configure camera:
- Connect camera to the network, find available IP address for it.
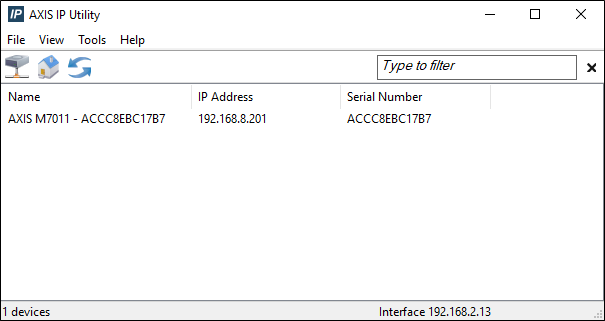
- Use camera finding tool from manufacturer to find the device on the network, e.g.:
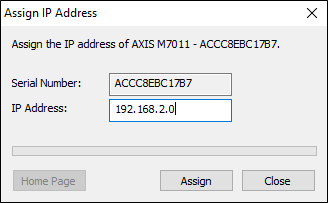
- Assign the static IP address to the camera
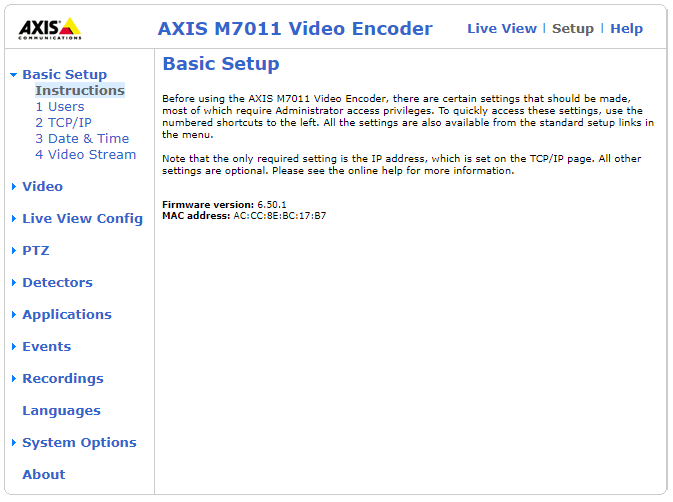
- Verify it is possible to access the camera configuration page
Network camera (analogue camera + encoder or digital network camera) has to be connected either directly to the unit or via an on-board switch and configured with a static IP address. Configuration can vary between different manufacturers. If for example the Axis M7011 video encoder is used with an analogue camera:
- If Intel Movidius Neural Compute Stick is used, plug it into an available USB port (preferably USB3 but it is also compatible with USB 2). Verify the device is visible in the Device Manager:
- Select "Browse my computer for driver software" and then "Let me pick from a list of available drivers on my computer".
- Un-tick "Show compatible hardware" option and select Intel in Manufacturer column and Movidius VSC Device in the Model column:
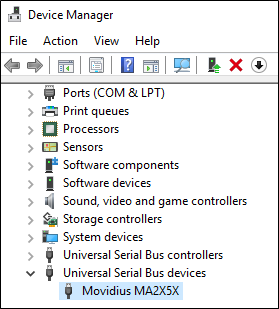
The Movidius device can show as either "Movidius MA2X5X" or as a "VSC Loopback Device" (when device is currently used).
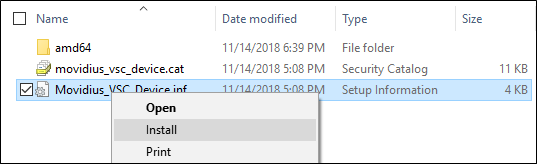
In the Device Manager, find "Movidius MA2X5X" or "VSC Loopback Device" in the Universal Serial Bus Devices section:
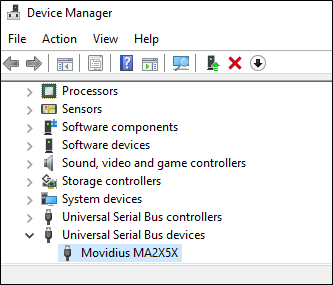
Right click on the device and select "Update driver".
In the new window:
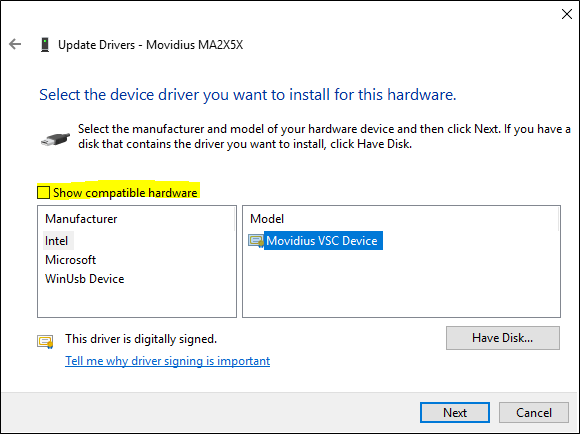
In "Update Driver Warning" click on Yes and finish the installation process.
Pitram Vision Service Installation
Pitram Vision requires Pitram Mobile to be installed first as Pitram Vision uses some of Pitram Mobile settings which are deployed in the Windows registry during the Pitram Mobile start up.
Run the installer, accept license agreement and configure installation directory and choose the installation components:
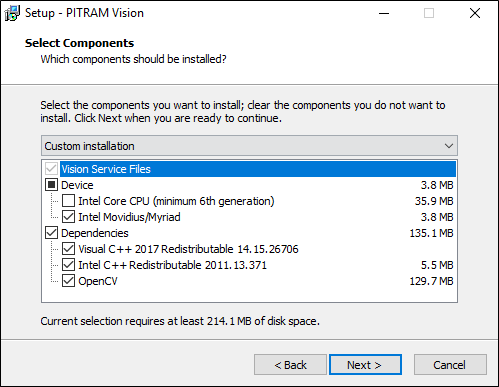
Select the device installed in the hardware installation and select all dependencies (if they are already installed, they will be updated if needed).
Device
- Intel Movidius/Myriad - for Movidius Neural Compute Stick (version 1 or 2) or Myriad mini-PCIe.
- Intel Core CPU - currently not used on any of the supported embedded systems. Can be used on desktop machines for development.
Dependencies
All 3 options must be selected.
After installation, go to services management, find Pitram Vision and go into Properties. In tab "Log On", configure the service to use local admin account (this is needed by AppLife updates):
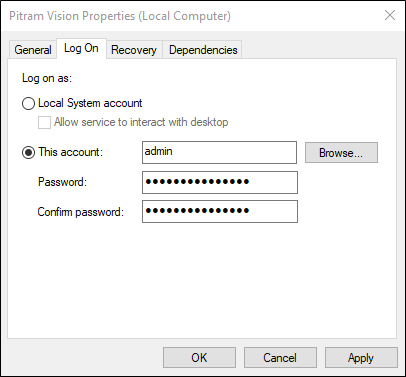
Pitram Vision Service Settings
Settings can be found in PitramVisionSettings.xml in the Machine folder.
Modes
Pitram Vision Service can run in 3 different modes. The mode to be used can be configured in reference data (or the config file):
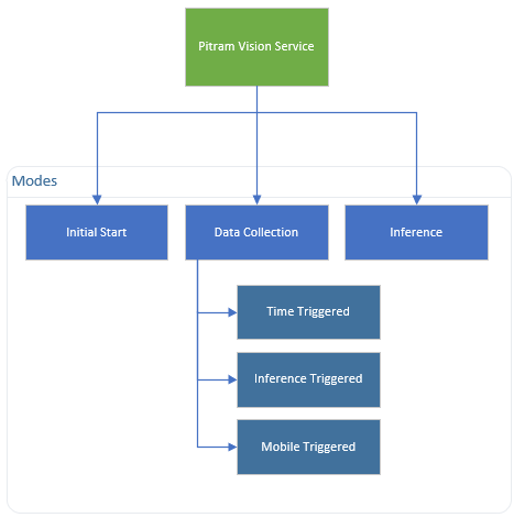
- Initial Start Mode - This is a default mode set during installation. In this mode, the service starts the communication host which can be used to configure camera (position, region of interest in the input image) as well as other settings.
- Data Collection - In this mode Pitram Vision will be saving frames from camera to a local container. There are 3 possible sub-modes:
- Time Triggered - frames saved periodically. No communication with Mobile is needed for this mode.
- Inference Triggered - frames saved periodically and when service detects changes in cycle state (e.g. from travelling empty to loading). No communication with Mobile is needed for this mode.
- Inference – This is a production mode where service is running inference (prediction) on live frames from camera and informs Mobile when a cycle state change has been detected.
Pitram Vision Configuration
In the Reference Data Editor of Pitram Portal, deploy a new reference group VisionUnitProfile. Also deploy an attribute of the same name in the MobileUnitConfiguration group.
- Configuration Items\Mobile Settings\Vision Settings\VisionUnitProfile
- Configuration Items\Mobile Settings\MobileUnitConfiguration -> VisionUnitProfile
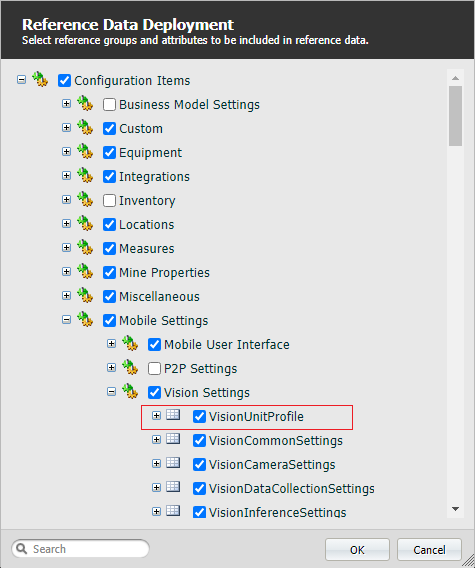
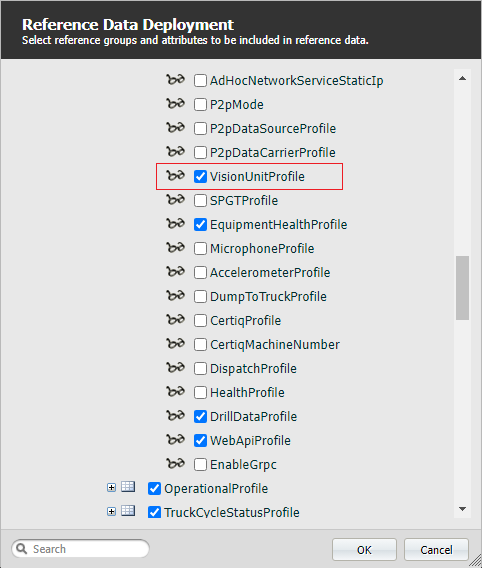
PitramVisionProfile Attributes
- OperatingActiveList – ActiveList (States -> Equipment states: Category:Equipment states, Primary Items: Status) with list of states in which PitramVision will operate. Note that if no state is selected then PitramVision will operate in any state.
- HardwareDisplayName - Name of the device to be displayed in Mobile as the device name (displayed next to the camera icon and in Mobile diagnostics).
- Mode - initialstart, datacollection, or inference
- PortNumber - Port number to be used by the service's communication host. E.g. 827.
- CameraConnectionString - This is either a system camera number (for usb cameras) e.g. 0 or 1 or url for network camera (e.g. http://user:password@ip_address/mjpg/video.mjpg).
- CameraTopLeftX - Top Left X region of interest.
- CameraTopLeftY - Top Left Y region of interest.
- CameraBottomRightX - Bottom Right X region of interest.
- CameraBottomRightY - Bottom Right Y region of interest.
- DC_OutputPath - Full path to where images will be saved.
- DC_ArchiveType - Container type of where images should be saved. Currently supported: SQLite and Zip.
- DC_MaxFileSize - Maximum file size for each container file (in MB). After reaching the maximum size, the service creates a new container. The purpose of this setting is to make it easier to download data from equipment when only limited network bandwidth is available.
- DC_ImageEncodingFormat - Format into which all images will be encoded. Most of commonly used image formats are supported, e.g. "jpeg" and "png".
- DC_ImageWidth - Images will be resized to this width (and proportional height) before saving.
- DC_InferenceTriggered - Enables inference triggered data collection.
- DC_MobileTriggered - Enables Mobile triggered data collection. Mobile Triggered mode overwrites Inference Triggered Mode.
- DC_TimePeriod - Number of seconds how often frames will be saved (time triggered).
- DC_MinimumFreeSpace - Minimum free space (in MB) on the drive that should be left when collecting images.
- I_ModelPath - Full path to the model used for inference. Model consists of three files (.bin, .mapping, .xml) and the path should only include file name, without any extension.
- I_Device - Device used for prediction (Movidius or Myriad for Movidius computer stick or mini PCIe card, CPU).
- U_NetworkUpdatesDirectory - Network address (URL or network share directory) to be checked by the service for application updates.
- U_LocalUpdatesDirectory - Full path to where application updates will be downloaded to.
- U_UpdateCheckIntervalMinutes - How often (in minutes) the service checks for new application updates.
- I_ModelUpdatesNetworkDirectory - Network address (URL or network share directory) to be checked by the service for model updates.
- I_ModelCheckIntervalMinutes - How often (in minutes) the service checks for new model updates.
- I_MaximumFramesPerSecond - Max number of predictions service can process per second