

Working with Multiple Tenants
A single Micromine ID account can be a user of multiple tenants (organisations) within one regional instance of Nexus Workspaces. Separate accounts are not required to work across organisations; for example, your company's own tenant and a support or partner tenant.
When your account belongs to more than one tenant, Nexus Workspaces lets you choose the organisation you want to work in. Tenant selection appears in three places:
-
When you link a project from Micromine Origin & Beyond (or another Micromine application)
-
In the Account menu of the Nexus Workspaces browser application, and,
-
Upon first sign-in to Nexus Workspaces.
Each tenant remains separate: its workspaces, projects, files, tasks and permissions belong to that Tenant only. Selecting a tenant simply determines which organisation's content you see and work with.
Requirements
To use multiple tenants, your Micromine ID account must be a member of more than one tenant in the same regional instance (for example, nexus.australia.micromine.com).
Membership of a tenant is managed by the Administrator for that tenant.
If your account belongs to only one tenant, Nexus signs you directly into it and no tenant selection is shown.
Select a Tenant - Link Project
When you link a local project to a Nexus Workspaces project from Micromine Origin & Beyond (or another Micromine application), Nexus asks which organisation to use.
-
In Micromine Origin & Beyond, open the Nexus backstage page and make sure you are signed in with your Micromine ID.
-
Click Link Project.
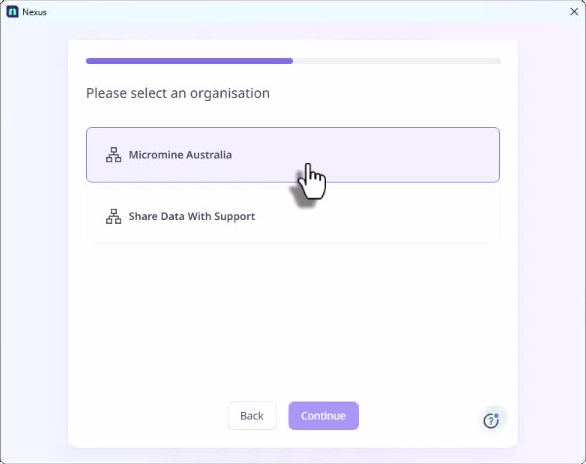
All tenants available to your account are listed in the dialog that opens.
-
Select the organisation you want to work in, and,
-
Click Continue.
The link project wizard continues as usual;
-
Choose an existing Nexus workspace from the selected tenant, or create a new one, then,
-
Click Continue to complete the link.
Switch tenants in the browser application
You can switch between your tenants at any time inside the Nexus Workspaces browser application. Signing out and back in again is not required.
In the browser application,
-
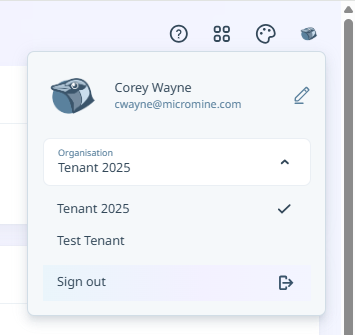
Click your avatar at the top right to open the account menu.
The Organisation drop-down shows the active tenant you are working in.
-
Expand the Organisation drop down to see all tenants available to your account.
The current tenant is marked with a check.
-
Select the required organisation from the list.
Nexus switches your session to the selected tenant and displays its workspaces. Your work in the previous tenant is unaffected, and you can switch back the same way at any time.
First sign-in for multi-tenant users
If your account belongs to multiple tenants and you open Nexus Workspaces for the first time, the Your Organisations page is displayed, featuring the same tenant selection used in the Micromine client desktop applications. Each tile shows a tenant and the number of workspaces it contains.
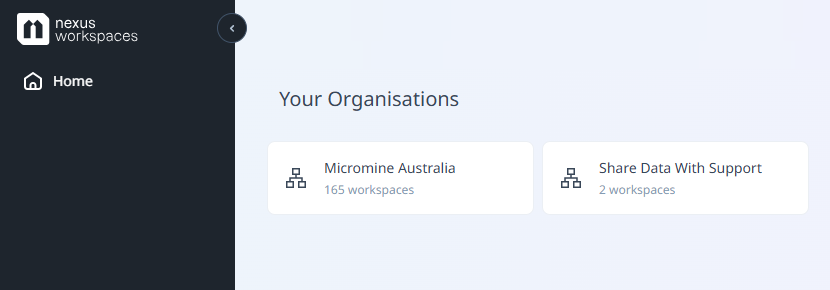
Select an organisation to enter that tenant. The All workspaces page for the tenant opens, and you can choose a workspace and start working.
More Information
Tenant content is isolated - Workspaces, projects, library storage, tasks and permissions are per tenant. Switching tenants changes which organisation's content you see; nothing is shared between tenants.
One set of credentials - You sign in once with your Micromine ID; tenant selection happens after authentication, so there are no additional passwords to manage.
Consistent experience - The same organisation selection appears in the Micromine desktop applications, in the link-project wizard, and in the browser application.
For information on everyday use of Nexus Workspaces, see Frequently Asked Questions