

Importing Target Values
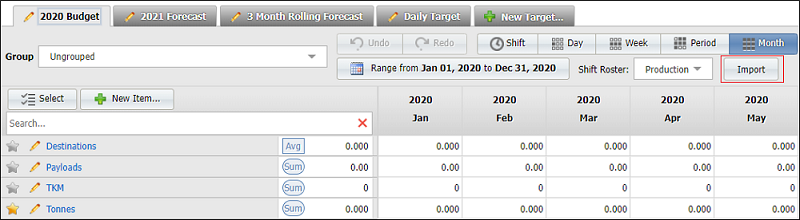
The Import option on the Targets ribbon is used to import values for existing target items from an Excel file.
In order to be successfully imported to the Targets module, a CSV file must contain a number of columns.
Mandatory attributes
| Attribute | Description |
|---|---|
| Name | This should be either an existing Target Item for Data only import, or an existing Target Item name or a valid reference data token code for Templates. |
| Measure | The Measure for a target item must be either Average or Cumulative. |
Optional attributes
| Attribute | Description |
|---|---|
| Group | Describes the Group to which the target item belongs - e.g. Equipment. |
| Subgroup | Describes the Subgroup to which the target item belongs - e.g. Measure. |
| Cost Code | The Cost Code to which the target item belongs. |
| Comments | Any relevant comments for the target item. |
| Decimal Places | The number of decimal places for any numerical values for the target item. If the value is NULL, or not imported, the default will be 0. |
To import an Excel file containing targets data, with the Targets module open,
-
Click the Import button in the menu ribbon.
The Import wizard opens.
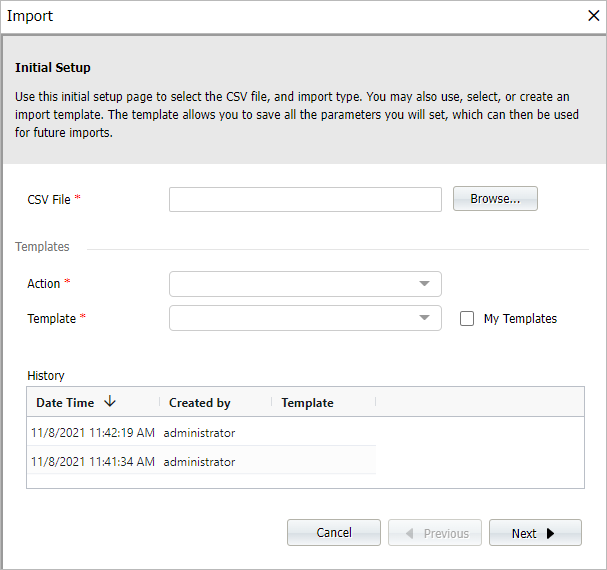
The CSV File field is used to select the .csv formatted Excel file that you want to import to the Targets module.
-
Click the Browse button to select the file for the import.
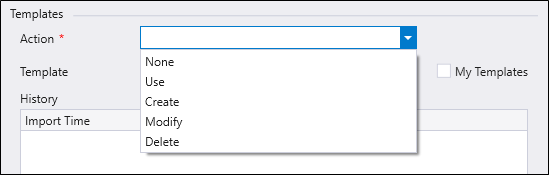
- Select an Action from the drop-down list provided.
You can choose not to use a template, choose to create a template, or choose to use or modify a Template associated with the data being imported.
Any template you create is saved as a global template. Select the My Templates check box to filter the template list to only show the templates you have created.
The template name must be unique.
Option Description None Template functionality won’t be used during import, in this case, users need to fill in the row information and select mapping columns. Use Select and use any of the existing templates. When this option is selected, the user will be navigated to the Data Preview page and then to the validation page. Create Creates a new template using mappings selected during a successful import. Modify Select and modify existing templates. When this option is selected, parameters from the template are preselected in all wizard pages. All changes will be saved for this template. Delete Delete the selected template. A Delete button will be enabled alongside the name of the template you select for deletion. Click the button to delete the template. 
If you have selected an Action other than None from the drop down,
-
Select or name the relevant Template from the menu or field provided.
The History grid displays information on the imports performed previously.
-
Click Next to continue.
-
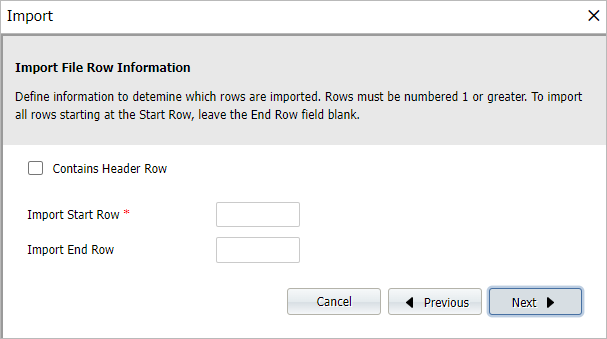
Specify whether or not a Header Row exists in the CSV file you are importing, and if so, set the Header Row Number.
The Start Row and End Row parameters can be used to import a subset of the rows in the file. If you are importing all rows, End Row can be left blank.
-
Click Next to continue
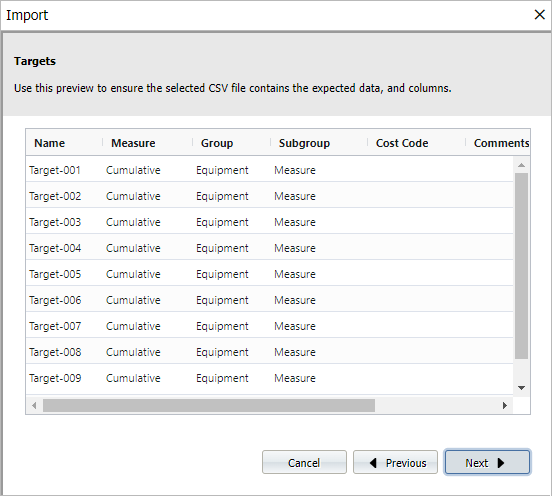
The Targets screen of the Import wizard displays a preview of the expected data and columns to be imported.
Using the column names, you can rearrange the order in which they appear by dragging a column to the desired position. Sorting is achieved by clicking a column header. Filters can also be applied to the grid using the button provided to open the filter:
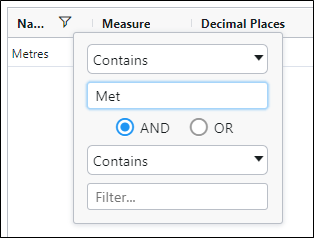
When the columns and data appear in the preview as required,
-
Click Next to continue.
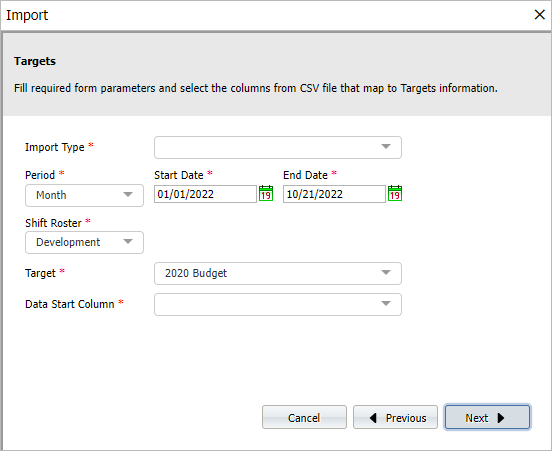
In the Targets Instructions screen ,
-
Select an Import Type from the drop down list.
-
Select Data only to import new data to existing Targets
In this case the import file should not contain the first column (target item). Data is imported against the currently displayed grid in Targets, starting from the top left cell. If the content of the imported file is bigger than the destination grid (more rows or columns), the values outside the range will be ignored.
-
Select Template to import data to Target templates
This will import values for new or existing target items. The Template drop down is enabled, displaying the available auto generated templates to select from.
The Token Mapping Mode and the Object - Attribute drop downs are also enabled. For the Token Mapping Mode, you can select:
-
Code - The value maps to token code.
-
Description - The value maps to token description. Used by default.
-
-
-
Select the Period type for the import from the drop down list.
-
Use the Start Date and End Date calendars to select the start and end dates for the selected Period.
-
Select the Shift Roster from the drop down.
-
If you selected a Shift Period, set the Start Shift and End Shift values from the drop downs.
-
Select the Target for the import from the drop down list.
-
Use the Group Definition Mode drop down (Data only) to select whether the File Column name or a Group Name column should be used to define the Group for the target.
-
If you selected File Column for Group Definition Mode, select the Group Column from the file to be used.
-
If you selected Group Name for Group Definition Mode, select the Target Item Group from the drop down.
-
Select the column in the file for the Item Column from the drop down.
-
Select the name of the column at which the data import begins from the Data Start Column drop down.
If you selected Template for the Import Type:
-
Select the Token Name Column from the drop down. This is the column to which the unique instance name will be written.
-
Enter the Suffix to add to the token name for each Target Item.
When the relevant details have been entered in the Targets page of the wizard,
-
Click Next to continue.
The Validation summary screen is displayed.
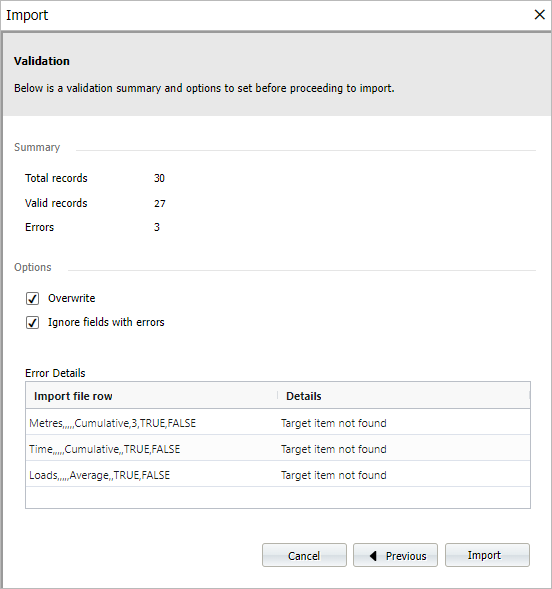
The screen displays a summary of the data that has been collected for import for Targets. The information displayed includes a value for Total records, Valid records and Errors.
The Error Details section of the screen displays details on any errors which occurred. You can use the Previous button to return to previous screens in the wizard, correct the errors in your CSV and step through again.
When you are ready for importing the data to Targets,
-
Click Import to complete the process.