

Link Your Local Project to the Nexus Project
Micromine Origin & Beyond integration with Nexus requires you to be connected to Nexus and signed in with your Micromine ID. To do this,
-
Click the Project tab to open the Backstage menu.
-
Select Nexus on the navigation menu.
-
Sign In with your Micromine ID.
-
Use the Link Project option to select the Workspace and Project you already have in Nexus, or create a new one.
Note: If you create a new Workspace or Project, you will still need to open Nexus in a browser to invite other users and define their permissions.
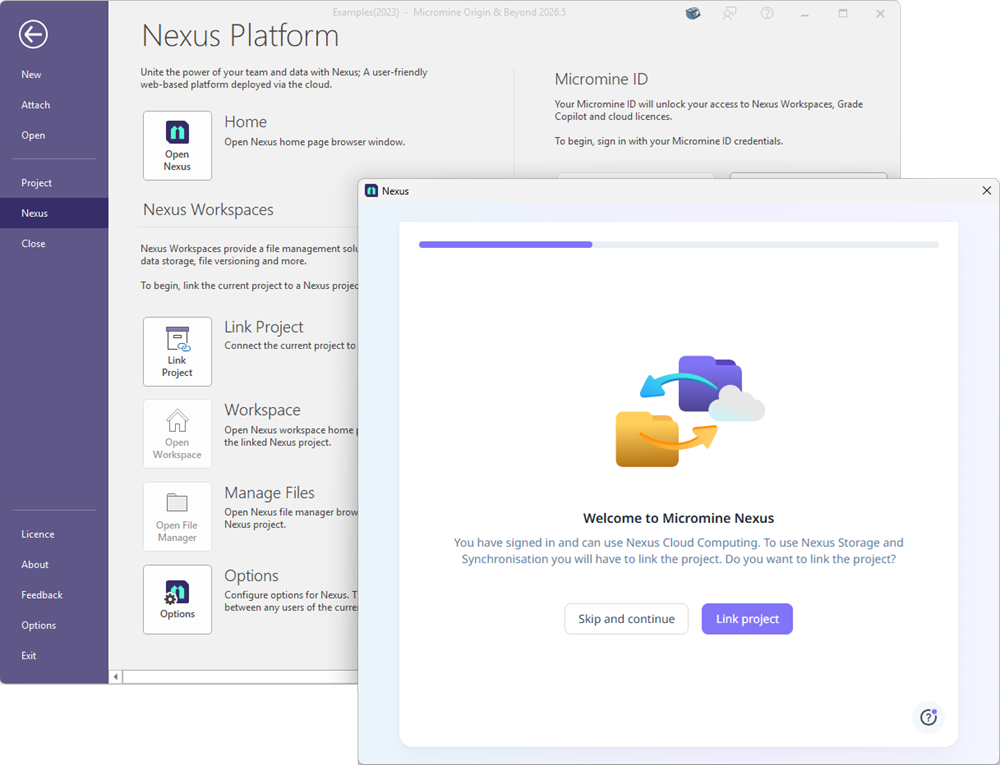
When the Nexus connection has been established and the Link Project process is complete, the Nexus Status in the Backstage Workspace Status group and in the Micromine Origin & Beyond toolbar should be green and display your selected Workspace and Project names.
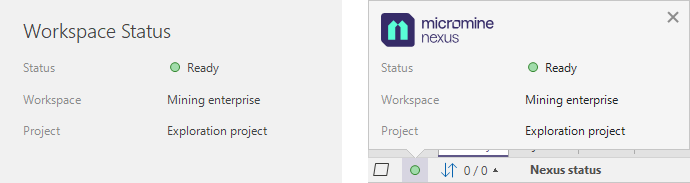
With the File Manager, you can start linking files in your Master Project using live links.
Uploading Drillhole Databases
Each separate .dhdb file and its related .DAT files do no need to be selected. Linking the .dhdb file creates a Nexus Drillhole object that includes all related .DAT tables.
If your project contains multiple Drillhole databases, use "dhdb" as a text search to filter all .dhdb files on the local side of the Nexus File Manager.
Use Select All, then deselect any files you do not want to upload. Click Upload to begin. You can monitor the upload progress in the lower-left progress bar.
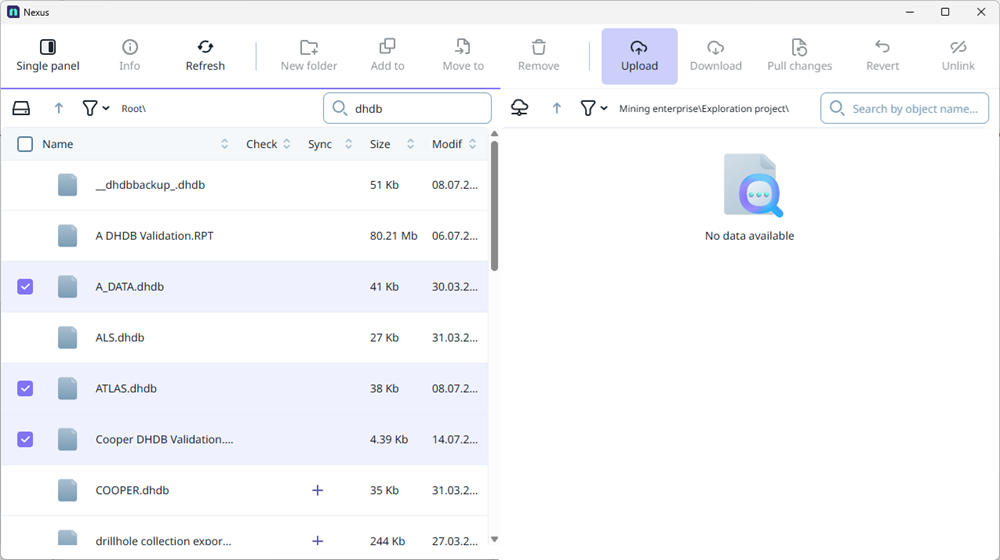
The selected Drillhole databases will be converted into Nexus Drillhole objects. This may take some time.
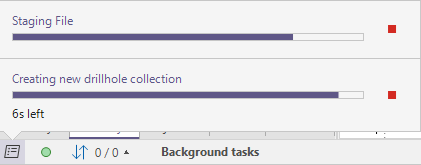
You will see the files listed in the Staging applet. To remove unwanted staged files, select the item and click the Recycle Bin button.
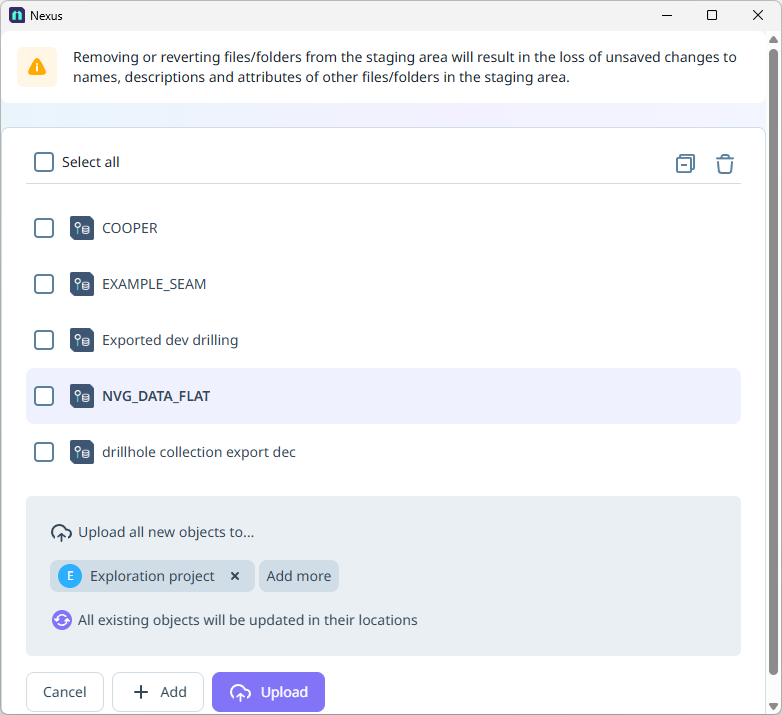
Note: Staging is not the same as uploading. After staging, click Upload to send the selected files to Nexus.
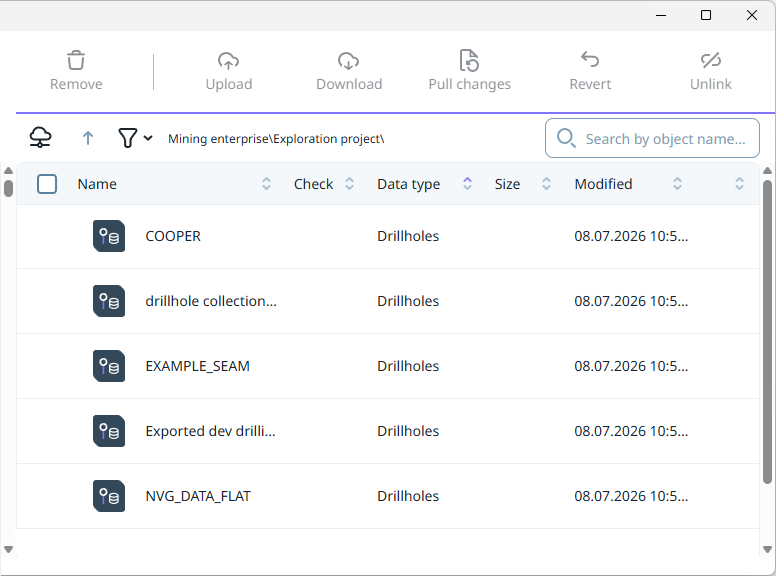
After the upload is complete, Drillhole objects will appear on the right side of the File Manager:
On the local side, uploaded .dhdb files will show a Linked status. Use the Status filter and select Up to Date to find them.
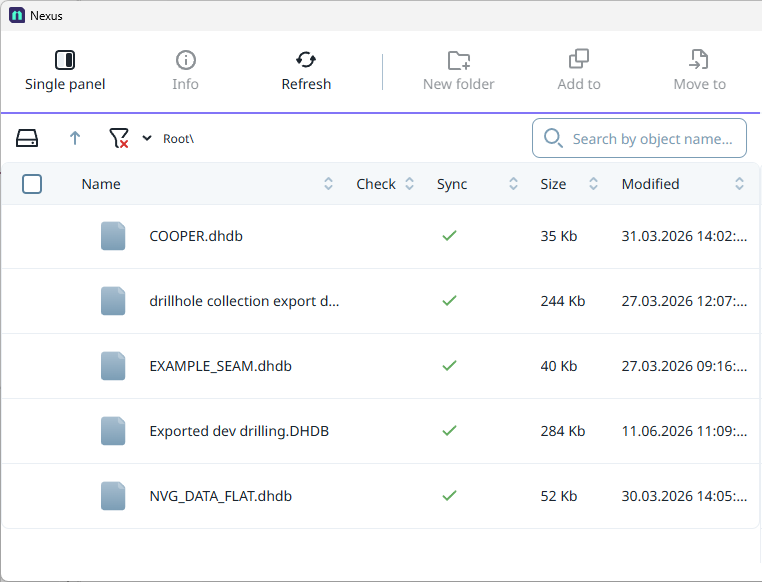
Nexus Workspaces stores all files in the same blob storage. No special folder structure is required. All new versions are stored under the same object, with version history.
Organising Nexus Project Storage (Optional)
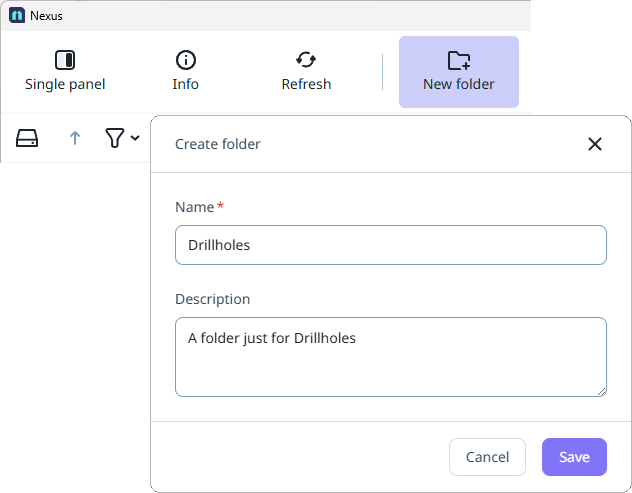
If you prefer visual separation between object types, you can use the New Folder button at the top of the File Manager. Using New Folder, folders are created on the Nexus side only.
-
Click New Folder and create a dedicated Drillholes folder.
-
Next, switch the local side to Nexus (Cloud) files:
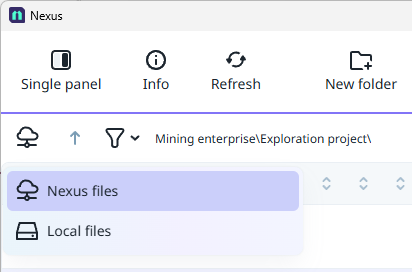
Next, to move your Drillhole objects into the Drillholes folder,
-
Select all files on the left side, then deselect the Drillholes folder.
-
On the right side, open the Drillholes folder.
-
Click the Move To button in the File Manager ribbon to move all the selected Drillhole objects into the Drillholes folder.
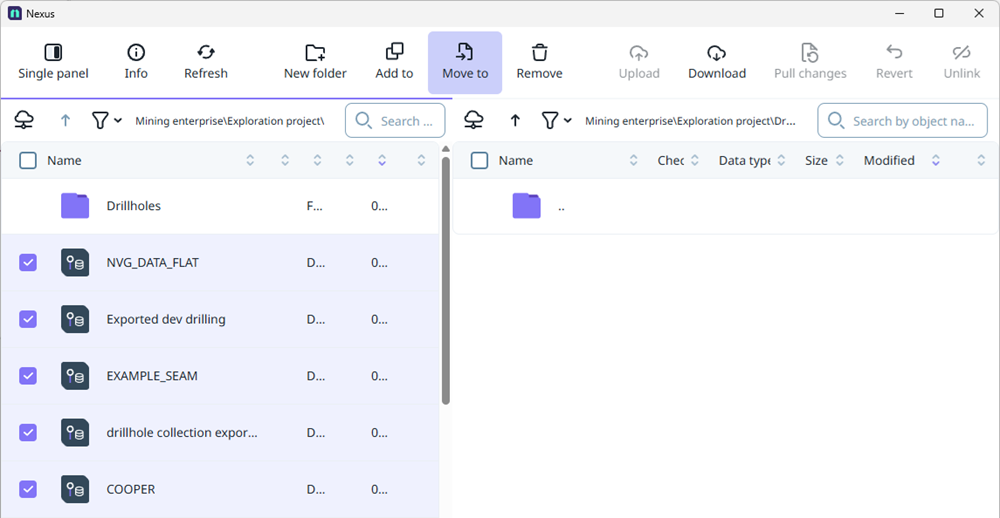
Note: Use Move To (not Add To). Add To keeps objects in the root and adds an extra location, while Move To relocates them to the subfolder.
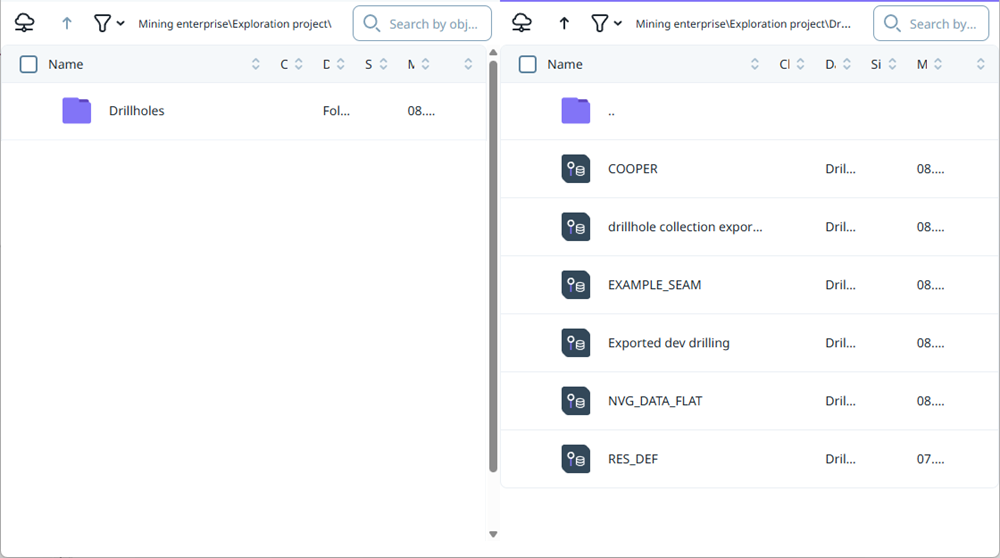
After the operation is complete, the drillhole files will appear in the Drillhole folder on the right side of the file manager:
Note: If you upload an entire folder containing Drillhole data, the .DAT files will also be uploaded separately, resulting in duplicate objects. Instead, upload only the .dhdb files, then upload remaining files separately.
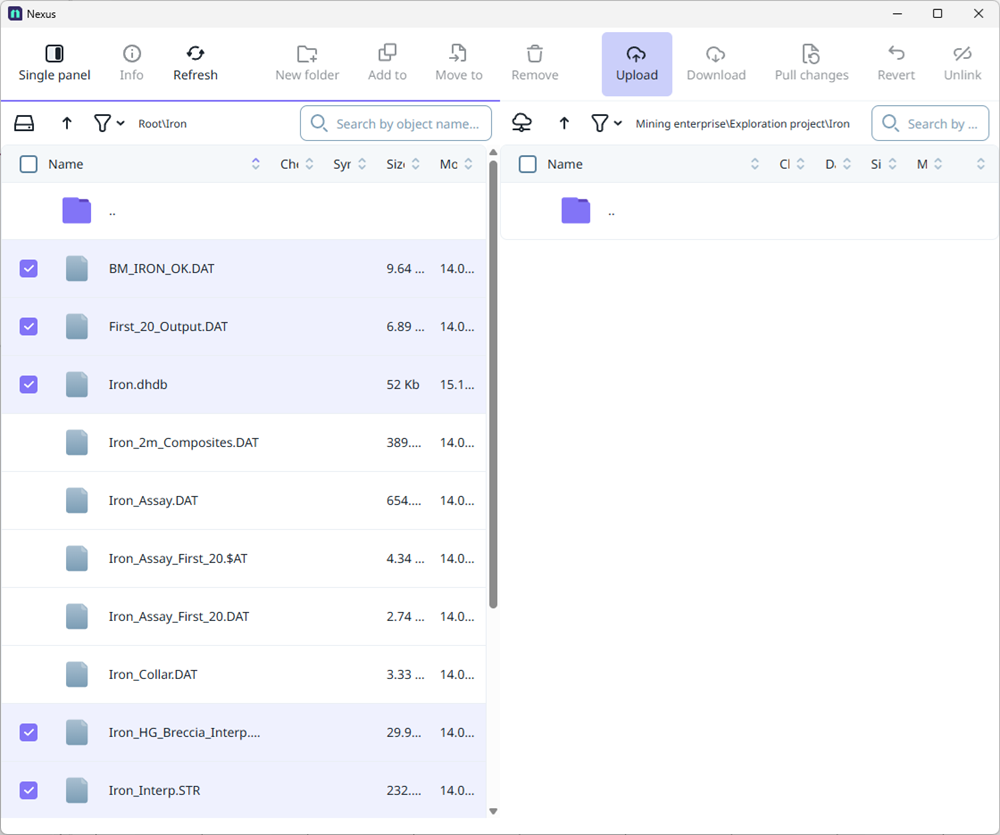
For example, to upload an Iron folder containing Drillhole data, block models, strings, wireframes, and reports, create the Iron folder on the Nexus side:
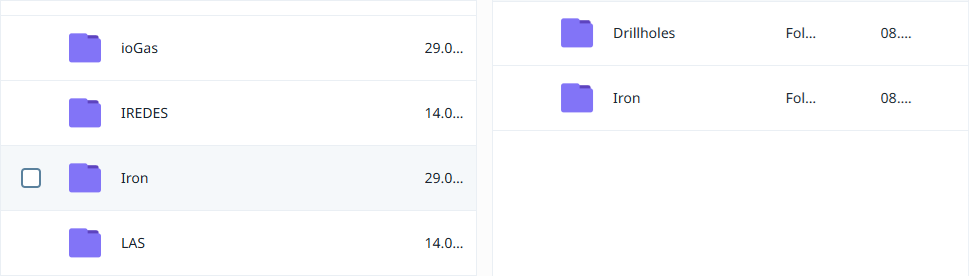
Open the Iron folder it so that selected files will be uploaded to that specific location.
On the local side, use Select All and deselect the files related to the Drillhole database. Leave only the .dhdb files, block models, reports, strings, and wireframe files selected, then click Upload.
 x
x
Note: Keeping objects in local subfolders will affect shared form sets, as the form set references those subfolder paths. Use the same folder structure in your Nexus project.
Uploading Wireframes
Create a Wireframes folder and upload all wireframes into it using the same folder approach.
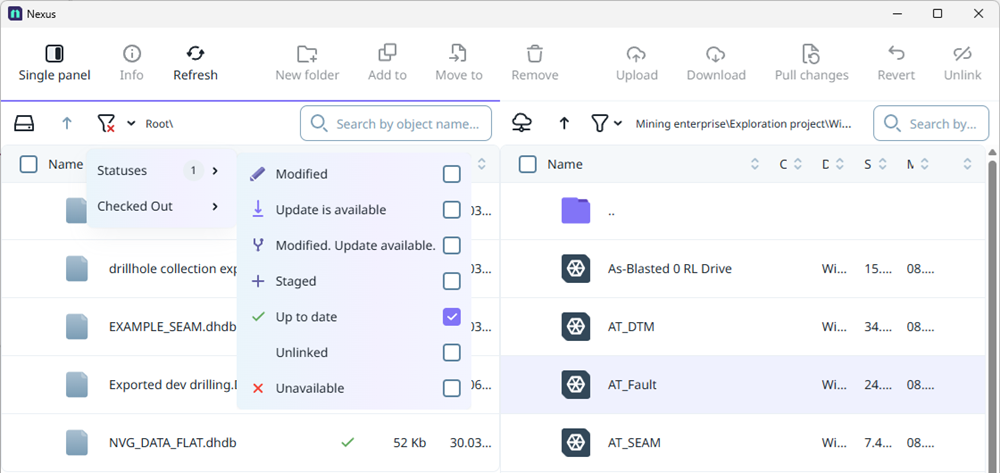
After the upload, all wireframes will be displayed as linked. Apply a filter on the local side to view them:
Uploading Sections
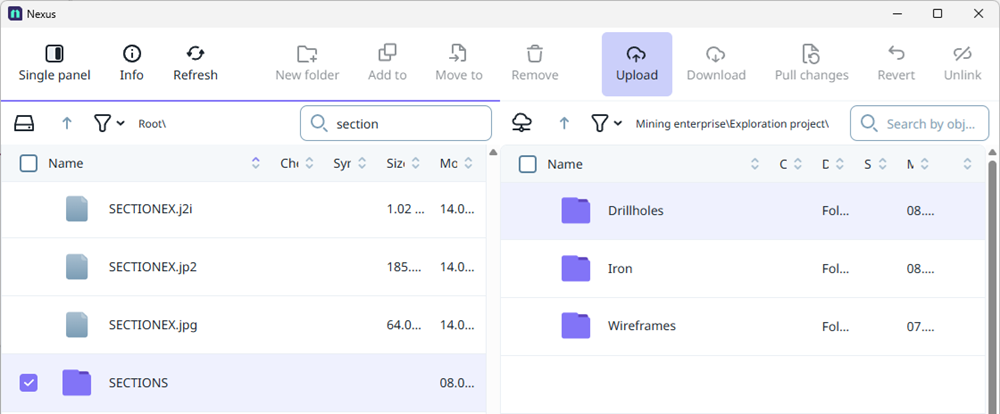
Sections can be synchronised at the folder level. Use Folder Sync: Select the Sections folder and click Upload.
Uploading Block Models
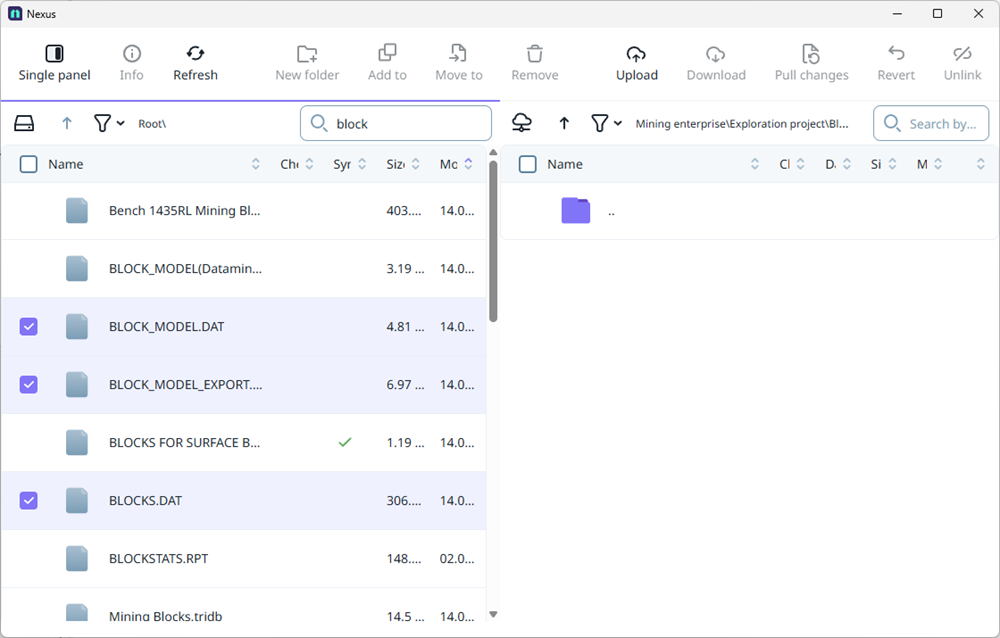
Create a Block Models folder in Nexus and upload any block models that need to be shared with the team.
Uploading Macros and Form Sets
Macro files and any forms they include can be shared through Nexus. To upload a macro:
-
Open the macro file in Micromine Origin & Beyond.
-
Select Upload from the Nexus group on the ribbon.
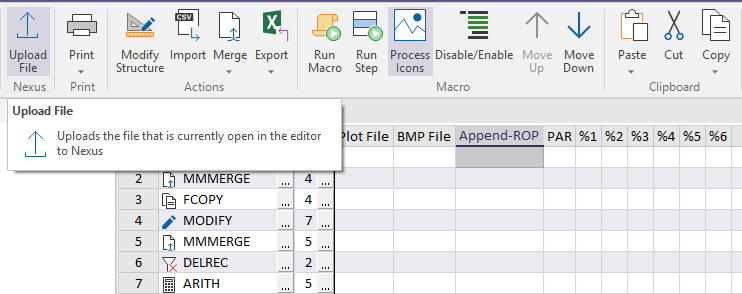
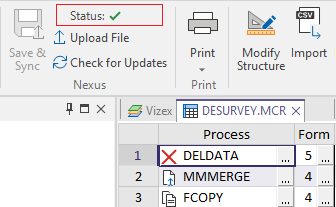
Once complete, you will see the status of your uploaded macro. Upload the associated form sets and files.
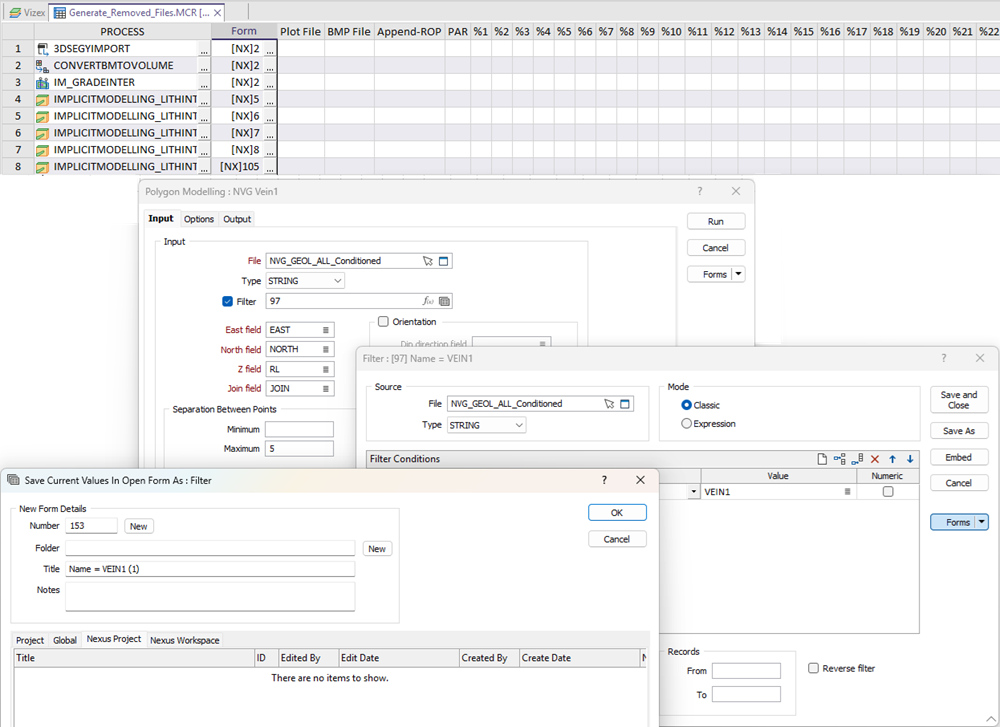
If your form set contains child form sets, save child form sets first, then the parent. For example, if a macro form set contains filters, save the filters to Nexus first, then save the parent macro form set.
After all the form sets have been saved to Nexus, you can save the macro.
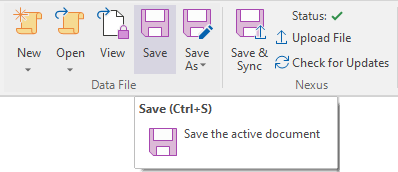
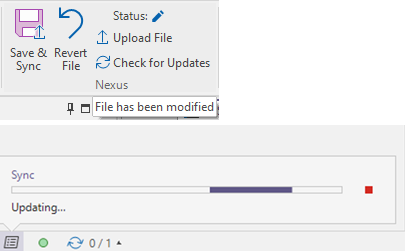
The macro status changes to Modified. Use Sync → Download and Upload to sync all local changes in the background.
Uploading Other File Types
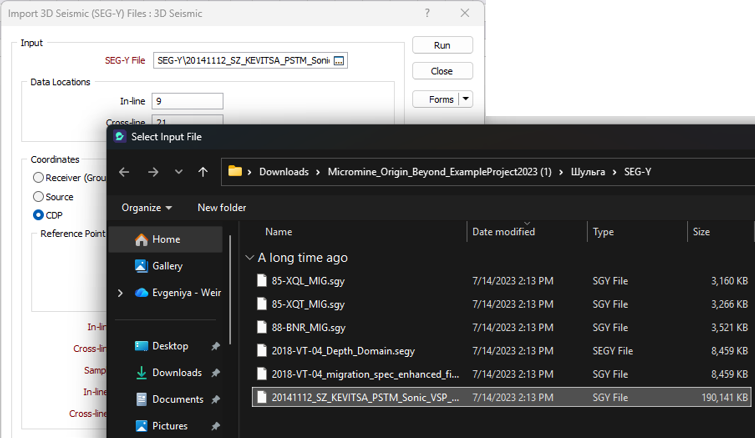
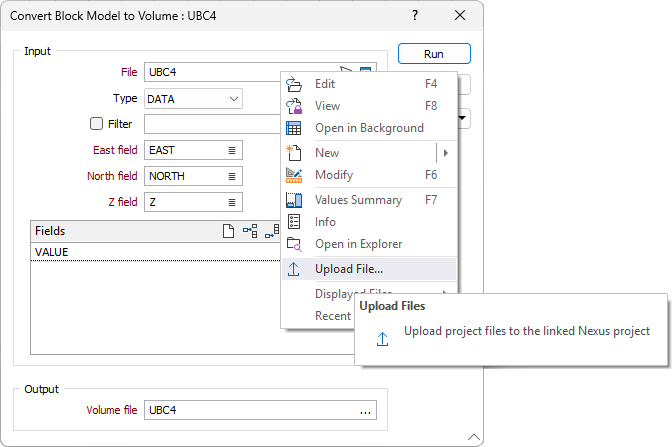
Files not edited in Micromine Origin & Beyond (such as third-party formats like SEG-Y) can be uploaded through the browser without generating a sync link.
If the form set references a subfolder rather than the project root, either update the form before saving to Nexus, or upload the file to the same subfolder structure in Nexus.
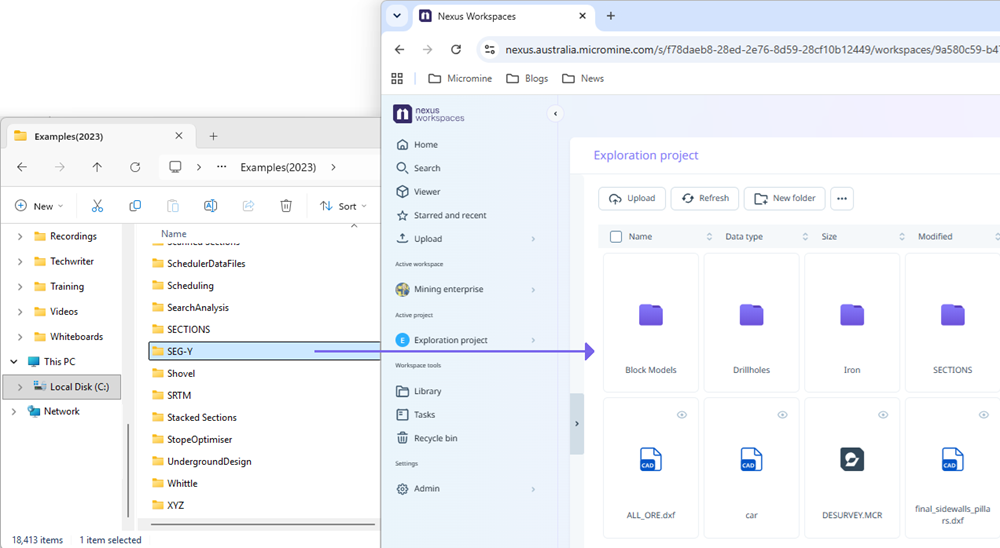
You can drag and drop the folder from Windows Explorer directly into Nexus in the browser.
Saving Form Sets and Saved Views to Nexus
Form sets can be saved at either the Project or Workspace level. In the following example, form sets will be saved at the Project level.
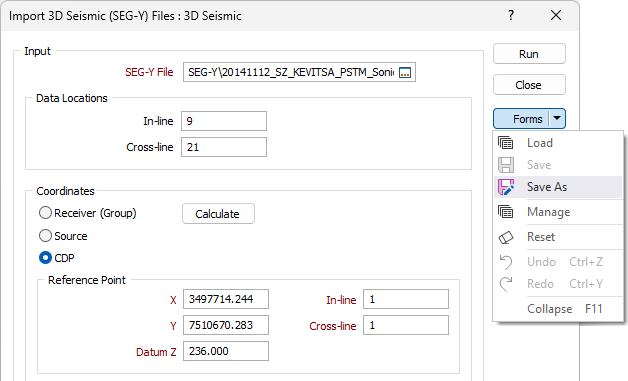
Select the Nexus Project tab as the active tab to save the form sets there.
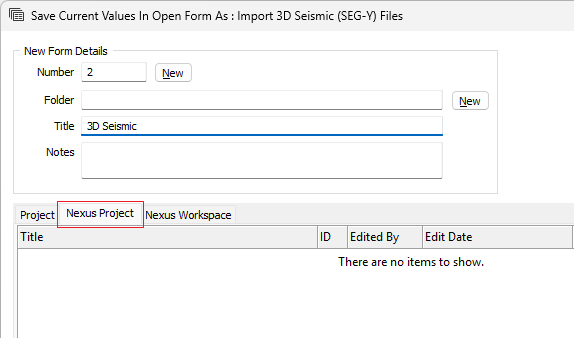
A Nexus Form Set will have the NX prefix before its ID.
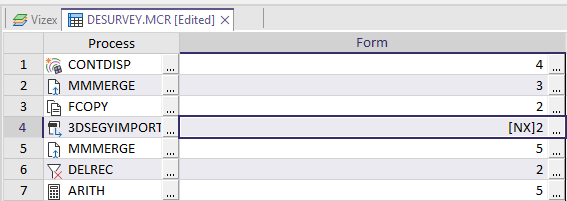
You can repeat the same process for the remaining form sets and files.
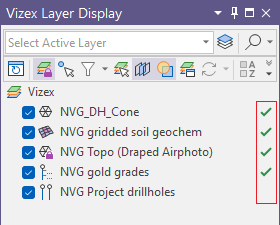
To sync a saved view, first check the sync status of Vizex layers in the Vizex Layer Display panel.
Save all child form sets (filters, colour sets) to Nexus first, then the parent form set.
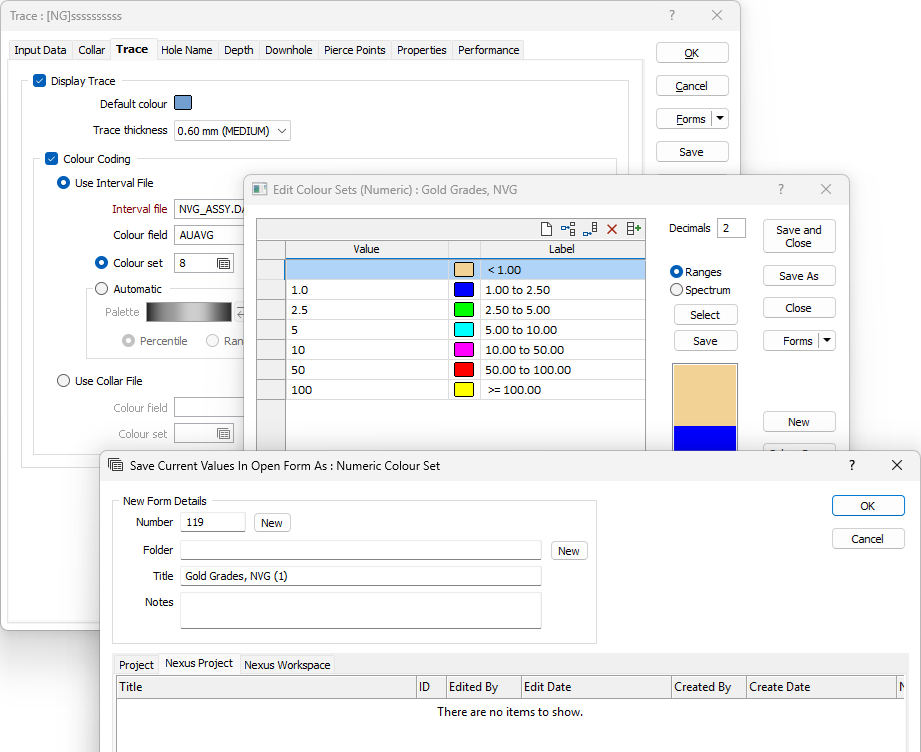
After all form sets and child form sets have been saved to Nexus and all required input files uploaded:
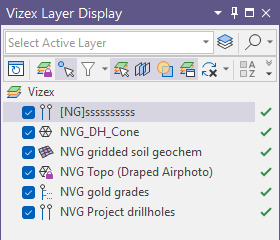
Double-click the Saved Vizex Views node in the Vizex Layer Types panel and save the current view as a saved view in the Nexus Project. Sync your changes with Nexus.
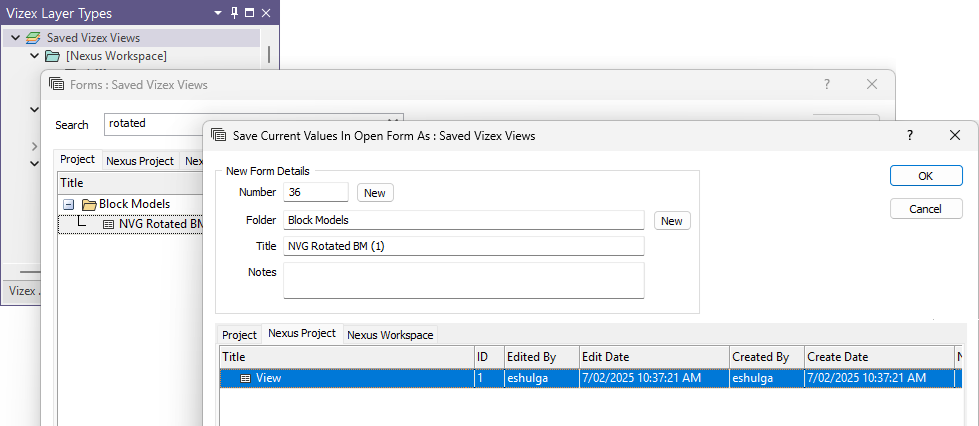
All layers should show a Sync status, and form set names should include the Nexus prefix.
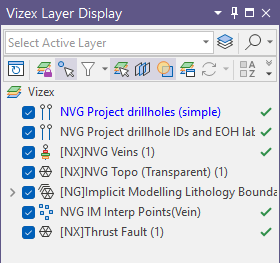
Migrating Form Sets Using Form Set Manager
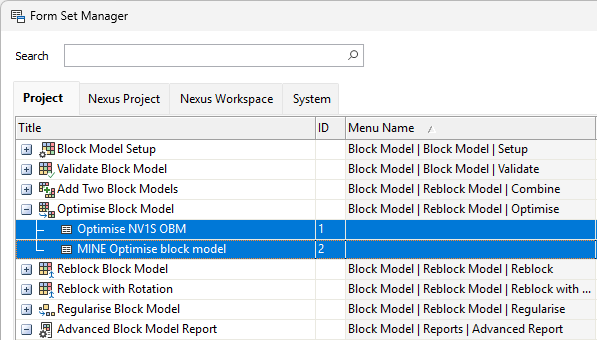
To migrate form sets to Nexus in bulk, open Form Set Manager from the Forms group on the Home ribbon.
Select all or specific form sets, then drag and drop them to the Nexus tab. Alternatively, use Copy and Paste.
Next Steps
You now know how to sync drillhole databases, wireframes, folders, sections, form sets, and saved views to Nexus.
You can continue building the Master project using this knowledge. The topics which follow will walk through how to download the Master project into a local Micromine Origin & Beyond project.