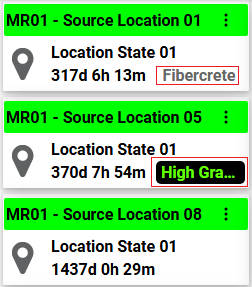
Locations
Location pages provide information about the type, detail and status of locations.
-
The first time you use the Location function you will be asked for an Active List that defines the type of locations you want to view:
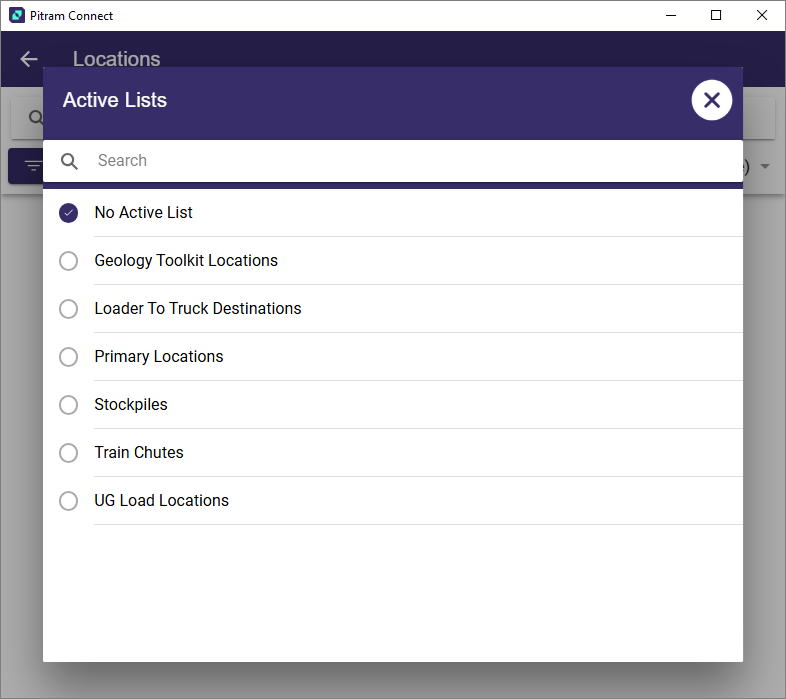
- When an Active List is selected, you will be asked to select a location status classification:
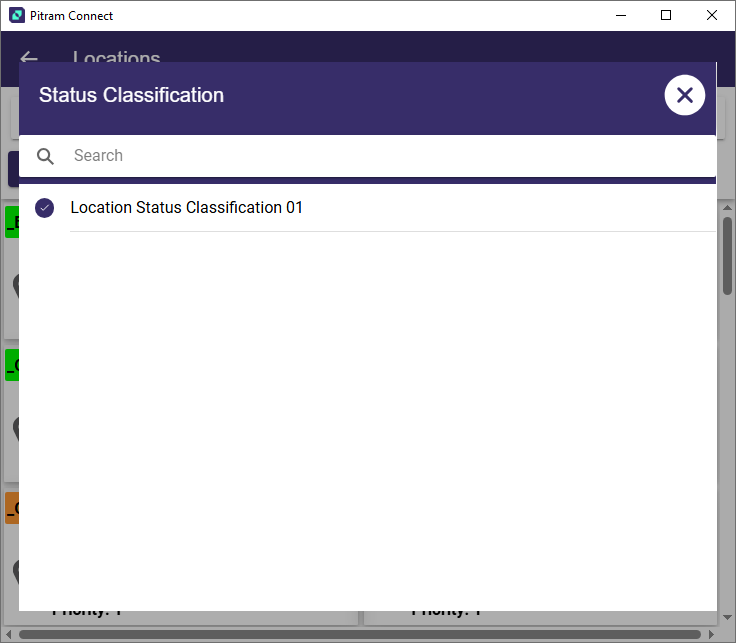
Once both selections are made, the Locations view is opened, displaying the Locations of the status and type you have selected:
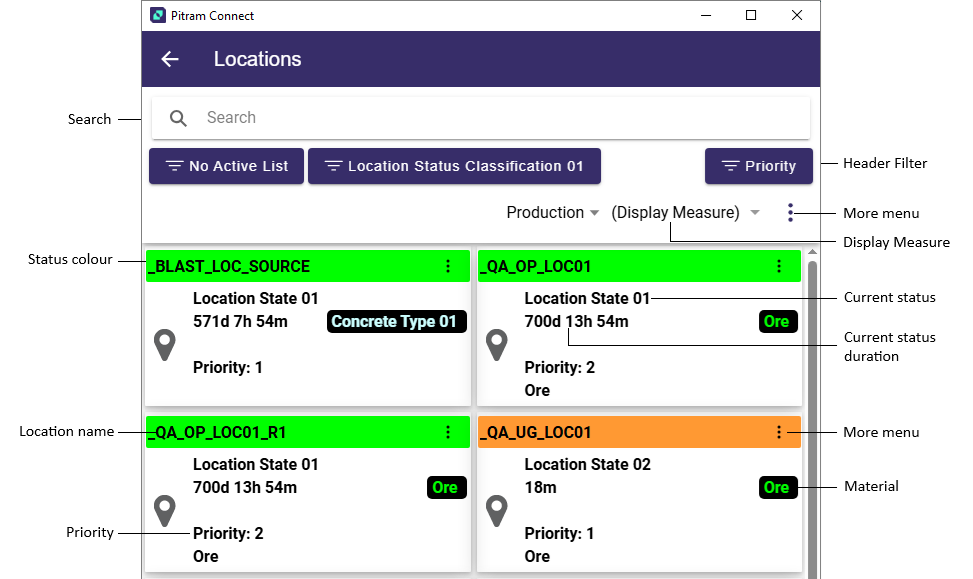
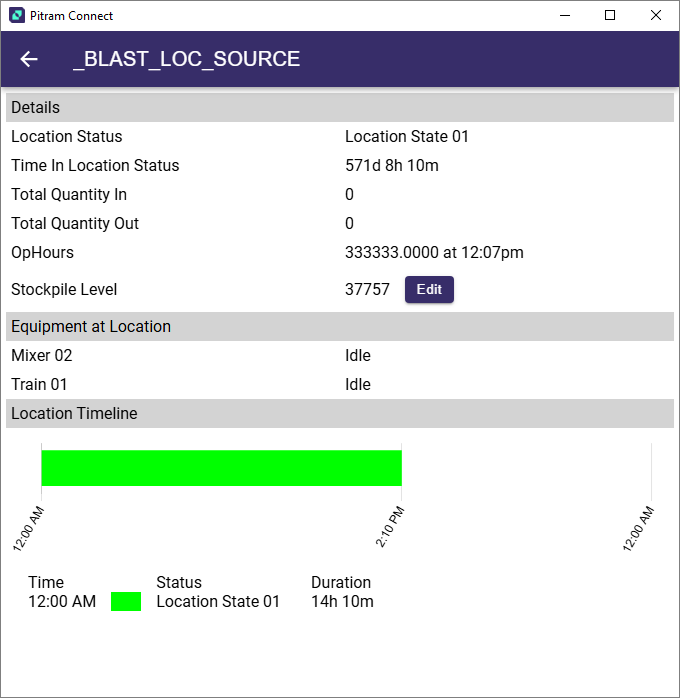
To view Locations details (status, duration of status, movements),
-
Tap on the location:
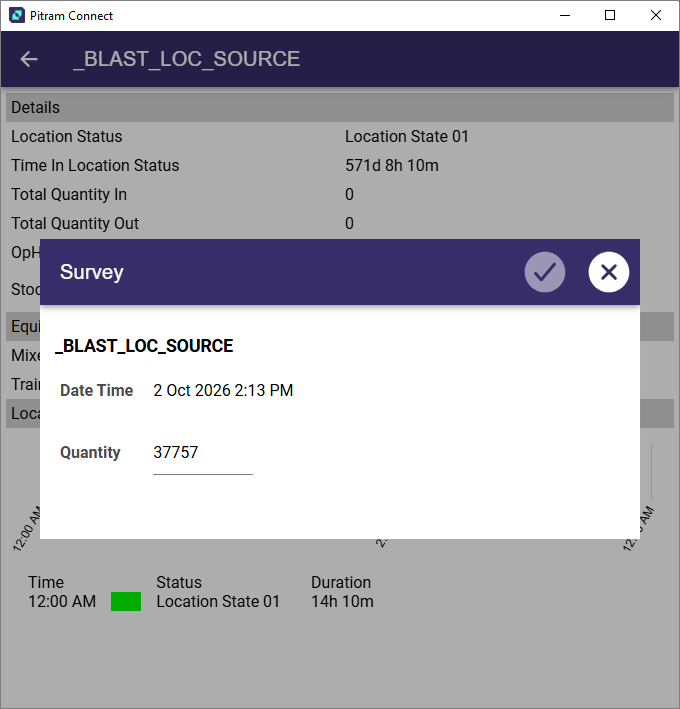
- If required, you can edit the Stockpile Level value from the screen using the Edit button.
-
Enter the required Quantity in the field provided and tap the check icon. Tap the cross to exit without making any changes.
Tap the back arrow at the top-left of the screen to return to the previous screen. You can also tap on the back arrow and swipe left to right to open the sidebar menu.
Search
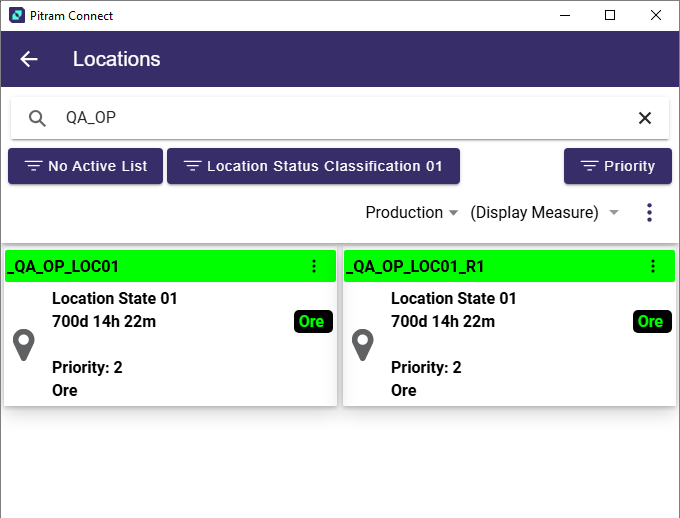
The Search field at the top of the page can be used to search for a location in the displayed list. Any text you enter in the Search field will filter the displayed locations to only results matching all of the entered text:
Filters and Options
The Locations displayed on the screen can also be filtered using the Filters at the top of the page.
The Active List and Location Status Classification buttons are available by default. You can change the displayed Locations by selecting an alternative Active List or Location Status.
The Shift drop down can be used to select the Production or Development shift for display.
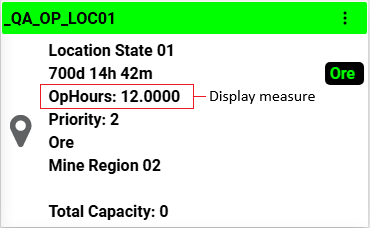
The Location Measures drop down is used to select the Measure to display on the Location details. If you tap the Location Measures drop down, the list of available measures is displayed:
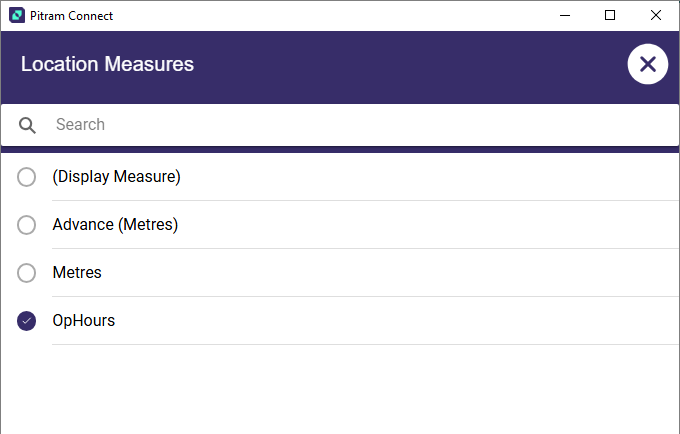
If you select (Display Measure), the configured Display Measure for the Location Type will be displayed. If you select an alternate option, the selected measure will be displayed in the Location detail card:
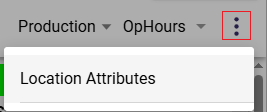
From the More menu, you can open the Location Attributes panel to select up to 5 attributes to be displayed on the Location card.
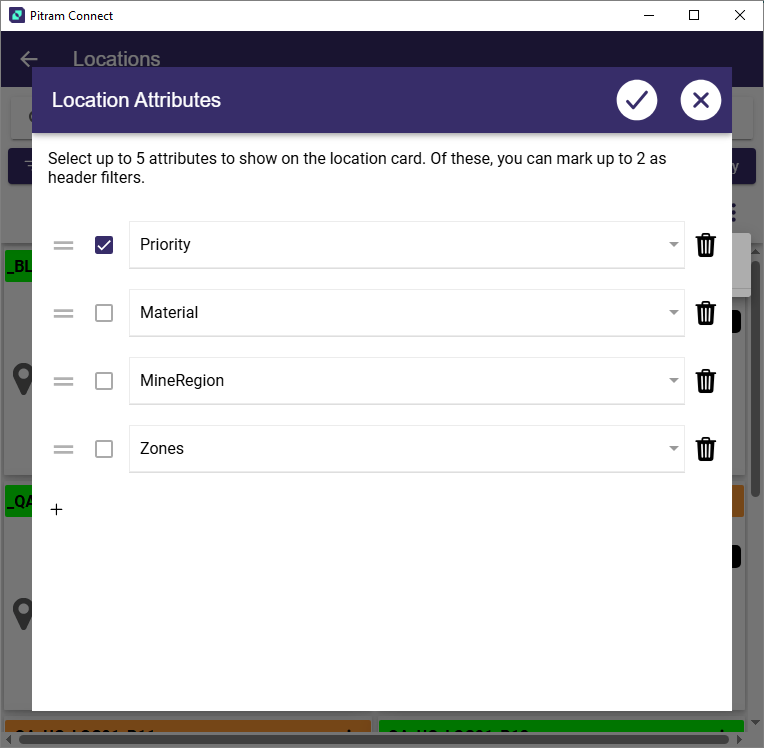
As outlined in the selection screen, you can select up to 2 attributes as header filters. These will appear at the top of the Locations page and can be used to filter the list.
-
Tap the Plus icon to enable a Select row in the Location Attributes panel.
-
Use the Select drop down to select a Location Attribute for display in the Locations card.
-
Repeat this procedure for up to 4 more attributes to display.
-
Select the check box at the left to designate any attribute as a header filter.
Only 2 header filters can be assigned.
-
Tap the Check icon at the top right of the panel to save your selections.
Any Location Attributes that were added will be displayed in the Location card. The designated attribute/s will also be displayed as header filter/s:
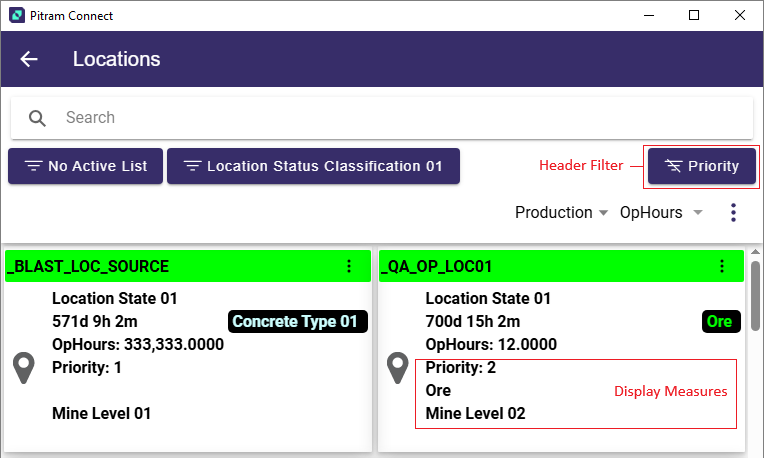
Any selected attribute that does not have a value for the Location will be displayed blank - as illustrated above for the Material display measure (Ore for one location, blank for the other).
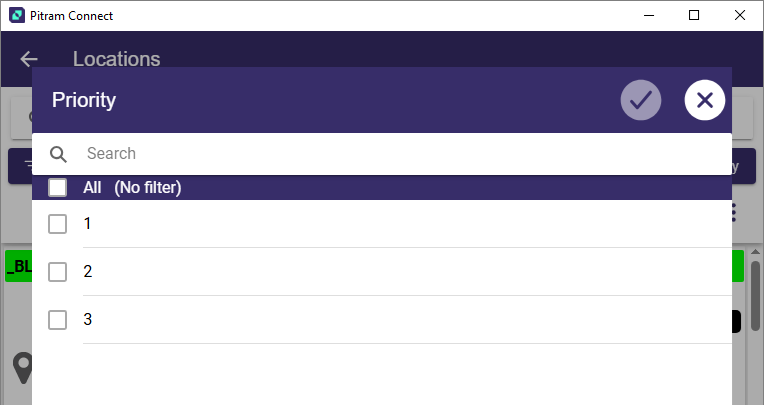
The designated Header Filter/s can be dropped down to select a filter for the Locations list:
-
Select the check box for any and all values you want displayed in the Locations list (e.g. Priority 1, 2, 3 etc.).
More Menu
For the Locations displayed in the Connect Locations screen, you can perform a number of tasks using the More menu at the right of each location:
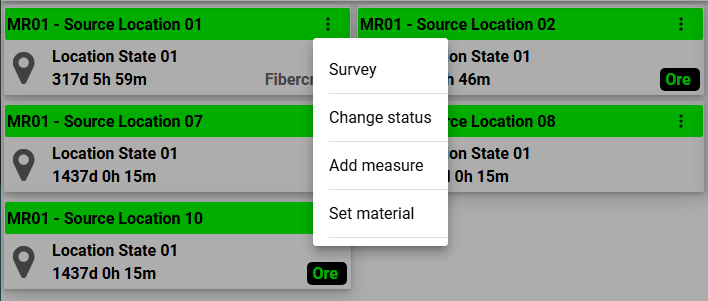
Survey
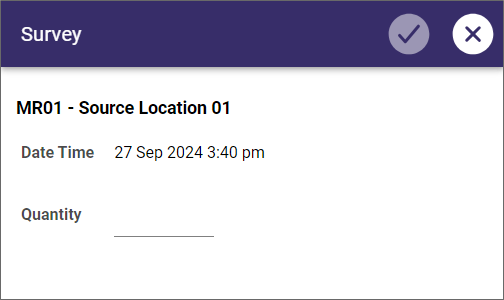
The Survey option is used to edit the stockpile level for the selected location.
-
Like tapping the Edit button from the Location Details screen, the option from the More menu opens the Survey dialog.
-
Enter the required Quantity in the field provided and tap the check icon. Tap the cross to exit without making any changes.
Change Status
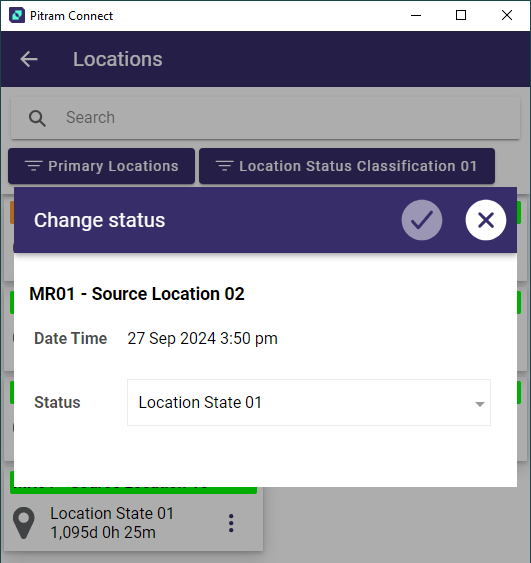
The Change Status option is used to set a status for the selected location.
-
Tapping the option on the More menu opens the Change Status dialog.
-
Use the Status drop down to select the required status for the location.
-
Tap the check icon to save the change, or tap the cross to exit the dialog without changing the status.
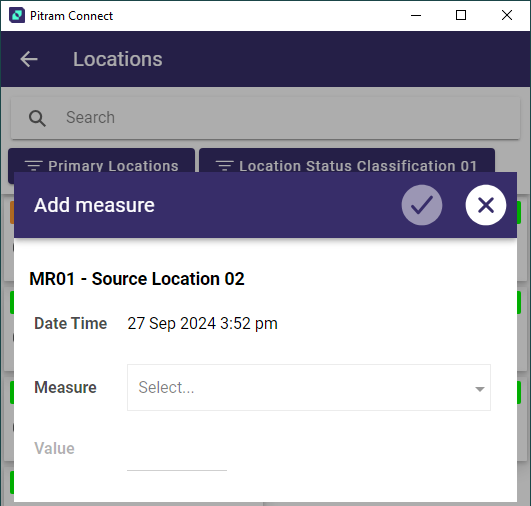
Add Measure
The Add Measure option is used to a selected measure and a value to the location.
-
Tap the Add Measure option on the More menu to open the dialog.
-
Use the Measure drop down to select the measure you want to add to the location.
-
Enter the Value for the measure in the field provided.
-
Tap the check icon to save the change, or tap the cross to exit the dialog without changing the status.
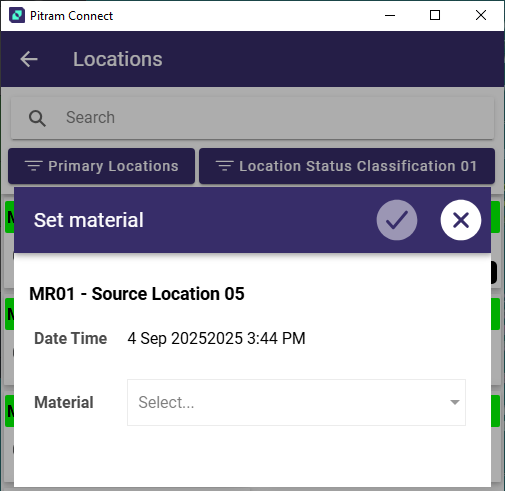
Set Material
The Set Material option is used to change the material type of a location.
-
Tap the Set Material option on the More menu to open the dialog.
-
Use the Material drop down to select the material type you want to add to the location.
-
Tap the check icon to save the change, or tap the cross to exit the dialog without changing the status.
The selected material will be displayed against the Location in the main page: