

Tools
Use the tools on the Drillhole Log tab to navigate the log and select the holes you want to view. You can also use the Create Intersection tool to interactively define grade/thickness intersections.
Note: Some tools which follow may not be available for both Drillhole Logs and Drillhole Log (Legacy).
Drillhole Log
-
Click Configure Form to open the form associated with the log display.

-
Click Open File to open a saved Drillhole Log file (.dhlog).

-
Click Export Drillhole Log to export the current hole to CAD format.

See Export.
-
Click the Print Layout to display the Drillhole Log in Print Layout, the way it will be displayed on a printed page or a PDF file.

-
Click the Print Current to send an image of the current hole to a printer. The log will be re-scaled so that a best-fit of the page is achieved, while still maintaining the aspect ratio.

-
Click the Print All to send an image of all holes to a printer, or print to PDF or XPS file format.

A Print Setup option is available on the Print Current and Print All menus:

Edit
-
Click Add Column to select a Drillhole column to add to the Drillhole Log.
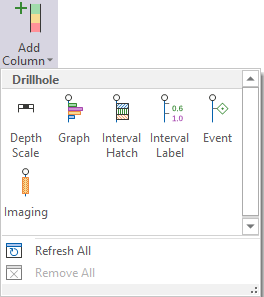
-
Click Create New Frame to create a new frame for the Drillhole Log by dragging a rectangle on the layout.

-
Click Active Intersections to configure inputs and outputs for creating intersections in the drillhole log display.

See Create Intersections.
-
Click Create Intersections to interactively create an intersection in the drillhole log display.

-
Click Save Intersection to write the Intersection results to the Output file. Alternatively, select Save from the right-click menu.
-
Click Copy Hole Name to copy the current hole name to the clipboard.

Click Undo and Redo on the application title bar to undo and redo (revert) the last action.
Navigation
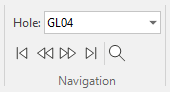
The following tools are provided on the Drillhole | Drillhole Log tab, in the Navigation group:
-
Click the First Hole button (or press CTRL + the Left arrow key) to show the first hole.
-
Click the Previous Hole button (or press the Left arrow key) to show the previous hole.
-
Click the Next Hole button (or press the Right arrow key) to show the next hole.
-
Click the Last Hole button (or press CTRL + the Right arrow key) to show the last hole.
-
Use the Hole Selection drop-down tool menu to select the hole to display:
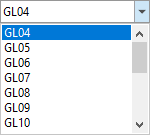
- Select Go to Hole by Name to navigate a drillhole log by specifying the name of the hole you want to view.

View
-
Click Forms Pane to toggle the Drillhole Log Forms Pane on and off. Use the Drillhole Log Forms Pane to select which data will be loaded and displayed in the log.

-
Click Display Pane to toggle the Drillhole Log Display Pane on and off. Use the Drillhole Log Display Pane to toggle the display of drillhole column types (and legends) on and off.

-
Click Properties Pane to toggle the display of the Properties Pane on and off. The properties of the columns and intervals you select in the log are shown in the Properties Pane.

-
Click Synchronise Views to add the current drillhole log view to a synchronisation pool or, if it is already synchronised, remove it from the pool.

When synchronisation is active, scrolling and zooming operations are synchronised between the views in the pool. For best results, those views will have the same page size.
-
Click Find Hole in Vizex to select the current hole in Vizex (if it is loaded in Vizex).

Conversely, you can select any part of a hole in Vizex, then right-click and select Show hole in Drillhole Log. See: Show Hole in Drillhole Log
Zoom
The following tools are provided on the Drillhole | Drillhole Log tab, in the Zoom group:
-
Click Zoom 100 Percent button to show the log at 100% of its normal size.

-
Click Zoom One Page button to show the current page in the window.

-
Click Zoom All Pages button to show all pages in the window.

-
Click Zoom Page Width button so that the width of the page matches the width of the window.
