

Georeferenced Images
Triangulations in the application can have an image mapped to them to assist in visualisation, scheduling and particularly Haulage Network placement.
The process to georeference points is manual and normally you will want to map exactly three points on the Triangulation and three points on the Image. For more information, see: Georeference an Image
The georeferenced images you add to a project can be shared across different triangulations. You can also export georeferenced images and their associated layers to PDF.
To manage those images:
-
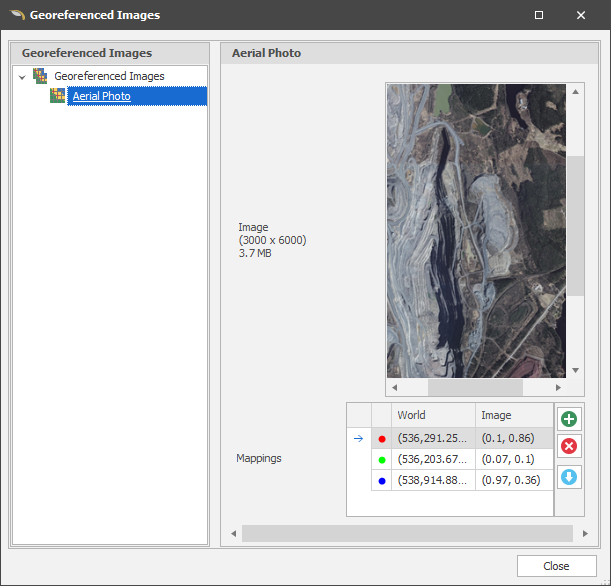
Right click on Triangulations in the Design Data pane and select Manage Georeferenced Images.
Add an Image
In order to best georeference an image, pick three clear points of interest on your triangulation (which exist on your image as well) and copy the coordinates of those points into a text editor, i.e. Notepad++. From here you can then:
- Right click the Geoereferenced Images header and choose New Georeferenced Image.
- Double click into the "No image data" section to import your image.
- Right click the image in the same three locations from your triangulation and pair them together using the + Mappings at the bottom of the popup window.
Once you have three mappings you can "Select" the image and wait for your triangulation to load with an image now applied.
Edit an Image
To edit the georeference information of an image:
- Select the image you want to edit in the Georeferenced Images pane.
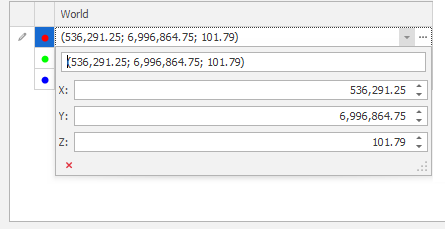
- Click on a World coordinates mapping row to edit those values:
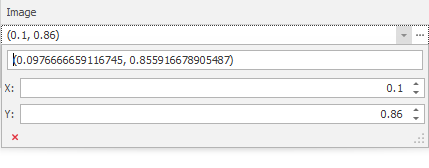
- Click on an Image coordinates mapping row to edit those values:
To start again by adding, deleting or importing georeference data, use the following tools:

|
Click to Add a new mappings row. |

|
Click to Delete the current mappings row. |

|
Click to Import mappings from a georeference map file. |