

Setting up a project
Within Vizex all information related to a saved view is stored within a project.
For a given project, multiple (string, point, image etc.) display layers can be created from the data for that project. Those layers can then be saved as a view.
To create a project
- Select Project | New.
- Enter the path to which the project will be saved in the Path field, or use the Browse button to navigate to the path.
- Enter a Name for the Project in the field provided
- Enter a title for the project in the Title field.
- Select the required Units for the project from the drop down.
-
If the Create folder for project at path check box option is selected, the project Name will be appended to the location path and the project will be created in a new directory. If the check box option is NOT selected, the project will be created in the location specified.
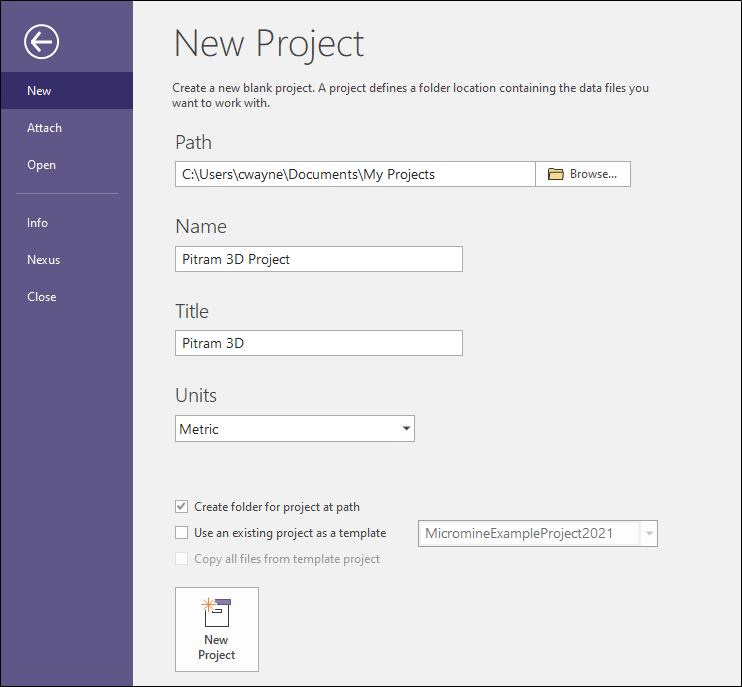
If you have a template project that you would like to use to create the new project,
-
Select Use an existing project as a template and select the relevant template from the drop down. Saved form sets can be copied from the template project to the new project.
-
If the Copy all files from a template project check box is selected, all files including Data, String, Survey files etc will be copied from the specified existing project to the new project.
- Click New Project to create the project folder.
To open an existing project
- Select Project | Open.
The list of projects available for selection is displayed.
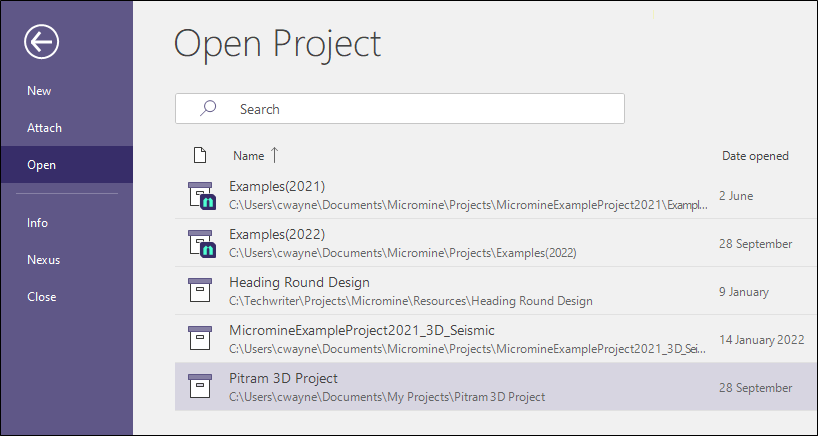
This is a list of the projects known to the application. If an existing project is copied to the local machine it must be attached as a project in Micromine Australia Pty Ltd:
To attach a project
- Select Project | Attach.
- Enter the Path of the folder containing your project data, or use the Browse button to navigate to the project to be attached.
- The Name field is automatically populated, but you can manually change this value if required.
- Enter a meaningful Title for the project, and
- Click Attach Project.
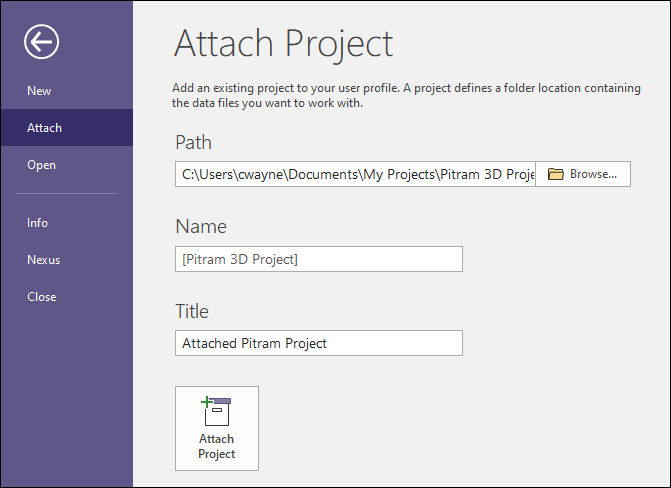
When you attach a project, the project Name and the Title are displayed on the title bar of the application.