Configure OIDC SSO in Microsoft Entra ID
The following topics describe how to configure OpenID Connect (OIDC) single sign-on (SSO) in Microsoft Entra ID.
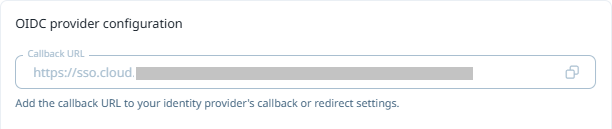
Copy the Callback URL for your Nexus Licence Manager environment
Before you begin, copy the Calback URL from the field in the Licence Manager on the Authentication page. You will use this URL to configure OIDC SSO in Microsoft Entra ID.
In Nexus Cloud Licensing,
-
Click Authentication in the menu at the right.
-
Select the Copy icon in the Callback URL field of the OIDC provider configuration section.
-
Save the Callback URL for use in the next steps in Configure SSO in Microsoft Entra ID.
Configure SSO in Microsoft Entra ID
Complete the following steps in Microsoft Entra ID to configure OIDC single sign-on:
-
Sign in to the Azure portal and browse to Microsoft Entra ID.
-
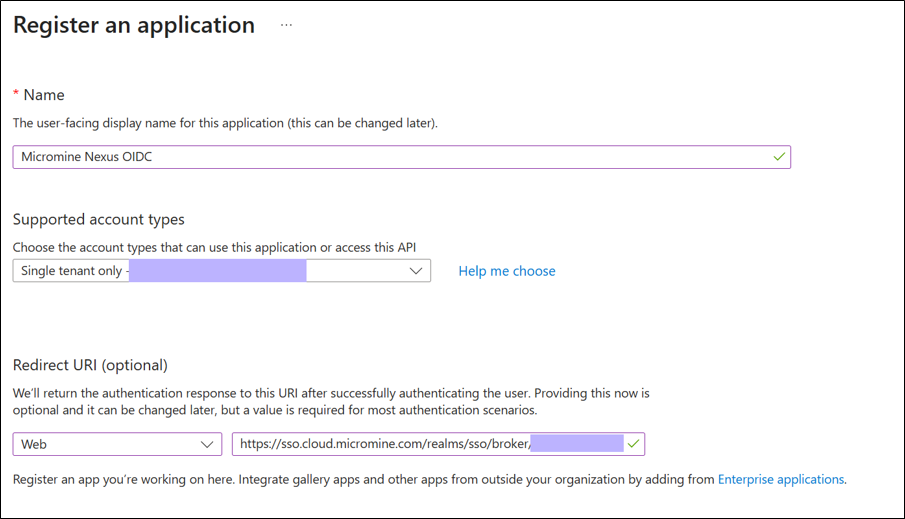
In App registrations, select New registration.
-
In the Name field, enter a name; e.g. Micromine Nexus OIDC.
-
Select Single tenant only.
-
In Redirect URL (optional), set the platform to Web, then paste the value copied in Copy the Callback URL for your Nexus Licence Manager environment.
-
Select Register.
-
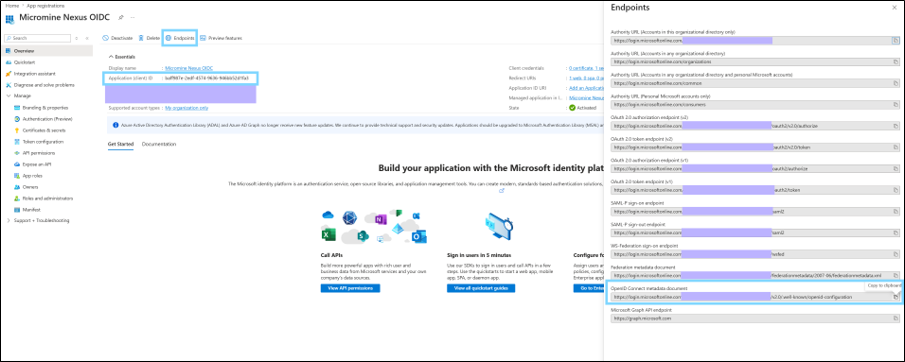
After registration, the Overview page for the registered app appears.
Note the value in the Application (client) ID. -
Select Endpoints at the top of the page, and note the following value:
OpenID Connect metadata document
-
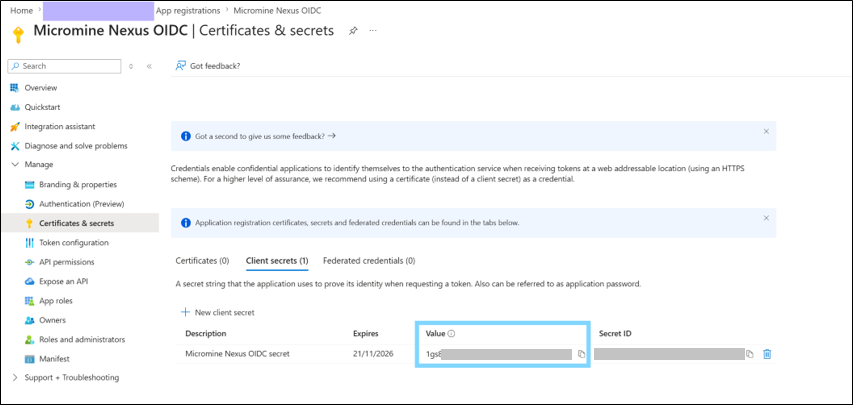
Select Manage | Certificates & secrets| Client secrets | New client secret.
-
In the Add a client secret pane, enter a value in Description, select an Expires value according to your corporate policy, and select Add.
Note the client secret Value in the Client secrets window.
On the Licence Manager Authentication page, copy the following values into the matching fields:
-
OpenID Connect metadata document to OIDC discovery endpoint;
-
Application (client) ID to Client ID; and
-
Client secret Value to Client Secret.
Keep the default values for Scopes and Email claim unless your Entra ID configuration uses different values.