Manage Licences
Accessible via the Nexus Home Home page, the Nexus Cloud Licencing service is used to view and manage the available licences for your company. Using the options provided, you can reserve licence seats, control permissions, invite users and view information on active sessions for those licences.
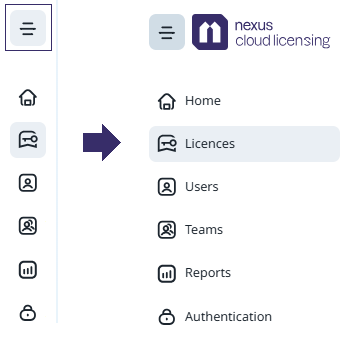
To manage your cloud licence(s), from Nexus Cloud Licencing, click Licences in the menu at the right to open the Licences page.

Company
If more than one company is configured for Nexus, you can display the licences for a specific company by selecting it from the drop down at the top of the page:
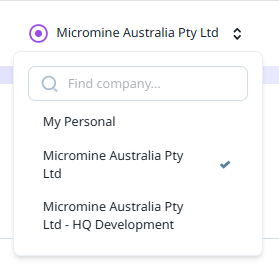
The My Personal option will display any personal application licences assigned to you. If you need a personal licence, you can request one on the Micromine Australia Pty Ltd website at micromine.com.
Get Support
The Get Support icon at the top of the page provides access to a list of options to get help and support on the application.
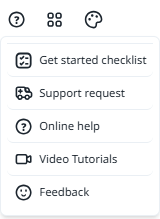
The Get started checklist option opens the checklist at the bottom right-hand corner of the page.
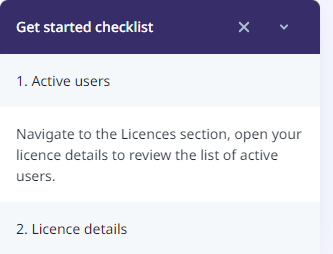
The Get Started checklist will contain information relevant to the user logged in. The list above is shown to a User who is not an Administrator. The Admin user checklist appears as follows:
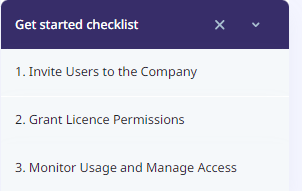
While the User checklist contains information on each step, from the Admin checklist, you can view short videos which illustrate how to:
-
Monitor Usage and Manage Access
Note: You can use the links above to view each video directly in your browser.
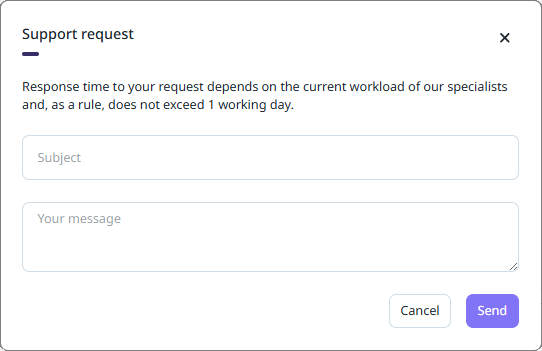
The Support Request option will open a form from which you can submit a request for support from Micromine Australia Pty Ltd.
If you click the Online Help option, the help for Nexus - Home will be opened in your default browser.
The Video Tutorials option opens a gallery of useful video tutorials that you can view in your browser:
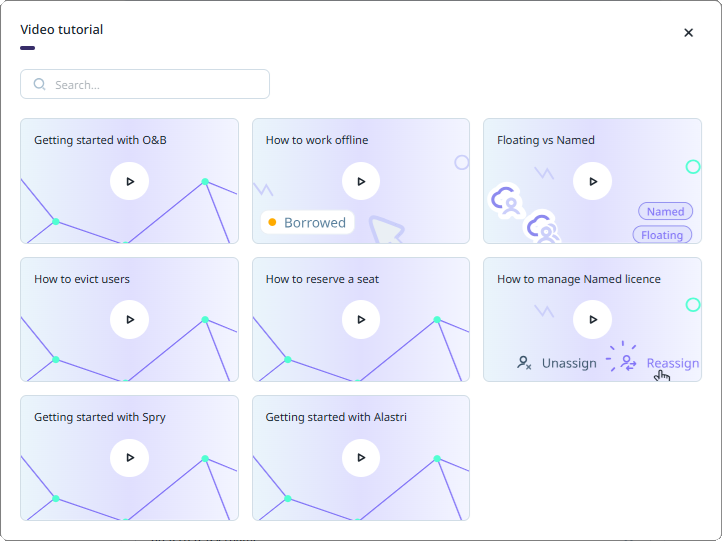
You can view the following videos using the links:
You can Search for a particular video using the field. More tutorials will be added to the gallery as they become available.
The Feedback option provides a pop up poll you can use to send feedback on the application:
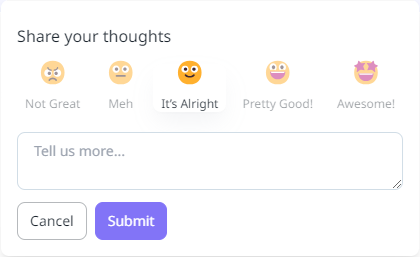
You can select an emoji to share your feedback and enter more details in the text box provided. Click Submit to send your response.
Apps
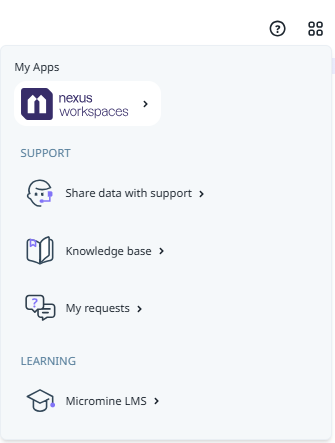
The Apps icon at the top of the page provides access to the available applications, including Workspaces and the Micromine Learning Management System.
-
Nexus Workspaces - Select Nexus Workspaces to open Nexus and the Workspaces to which you have access.
-
Share data with Support - Select Share data with Support to upload requested information and files to Micromine Australia Pty Ltd Support.
-
Knowledge Base - Select Knowledge base to visit the Micromine Technical Support Knowledge Base.
Note: A subscription is required for access to the knowledge base.
-
My Requests - Select My Requests to connect with your Support requests in the Zendesk portal for Micromine Australia Pty Ltd.
-
Micromine LMS - Select Micromine LMS to link to the Micromine Australia Pty Ltd Learning Management System (LMS).
Note: Licenced users with a Micromine ID have access to the LMS. If you require an invitation to use the LMS, contact your Nexus Administrator for more details.
Appearance Settings
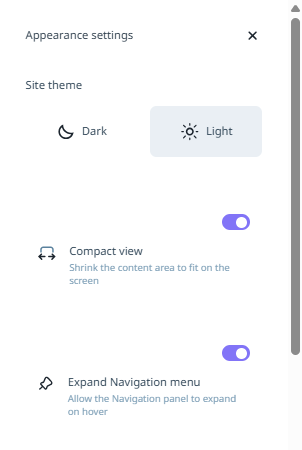
The Appearance Settings icon at the top of the Licences page opens a panel from which you can configure the looks and feel of Nexus Home.
|
|
|
Site Theme
Choose a Site theme for your Nexus Home browser windows. Light and Dark themes are currently available. Light is the default theme. Select the Dark option to switch themes:
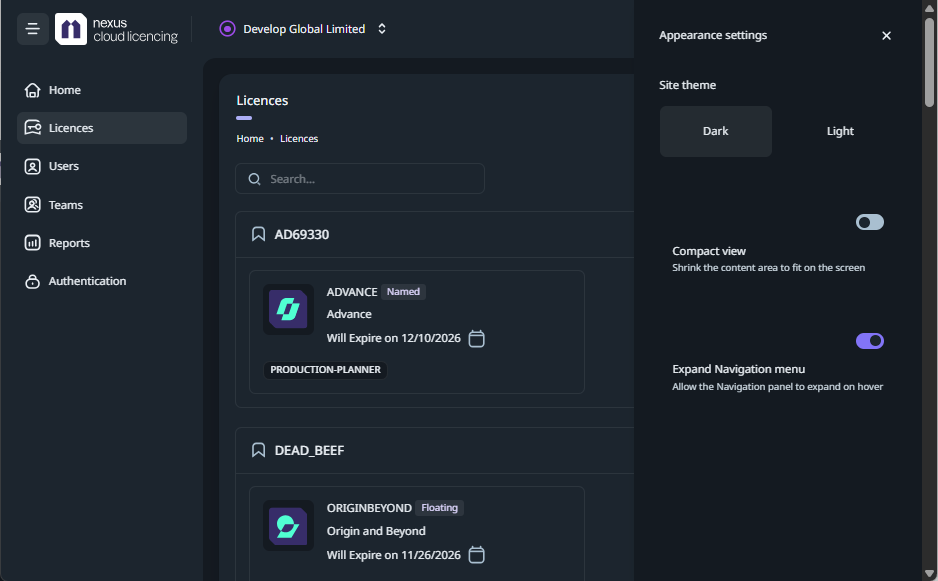
Compact View
By default, Nexus Home is in standard view. If you toggle the Compact view option ON, the page content will be 'shrunk' to fit the middle of the screen. In standard view, the content is expanded across the whole screen.
Expand Navigation Menu
If you toggle the Expand Navigation Menu option ON, the menu at the left of the page will expand when you hover with the mouse:
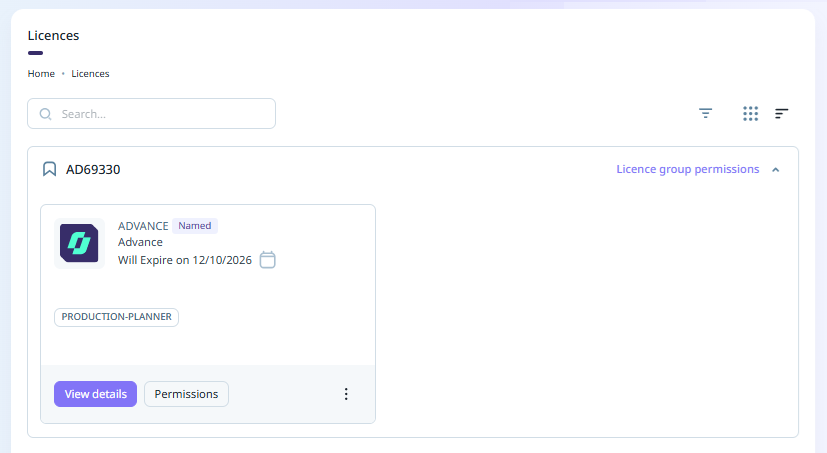
Licences
The Licences pane displays the current licences available for the selected Company.
Licence Types
The following cloud licence types are available:
-
Named- The seat is reserved for a specific person, tied to their identity/email. Only that user can access the licence.
-
Floating - Seats are available to all company users with Use permission to the license. Only a defined number of users can access the license simultaneously (based on the number of seats available). Some seats on the licence can be reserved for specific users.
Note: Time credit licences are also Floating. They cannot be borrowed unless they are a hybrid overallocation licence (time credits and available seats) where seats can be borrowed.
The Filters button  opens the Filters panel at the right.
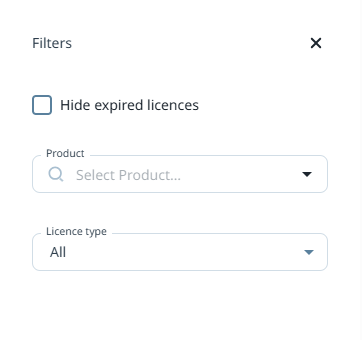
Select the Hide expired licences check box in the Filters panel to remove any expired licences from display on the list.
A red circle icon indicates how many active filters have been applied.
![]()
If you open the Manage Licences page with active filters applied, a notification will appear in the footer:

With either of these filter indicators, you can select the Clear all filters option to remove the configured filters.
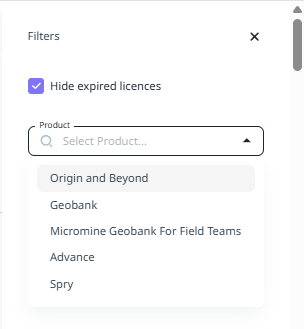
The Product drop down list is used to filter the licences displayed by a specific product or products:
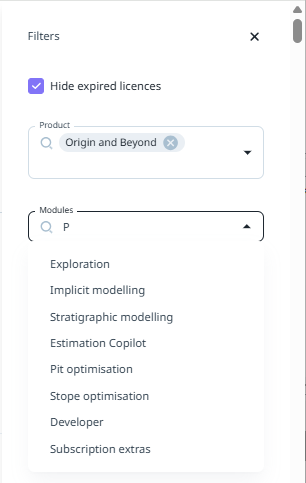
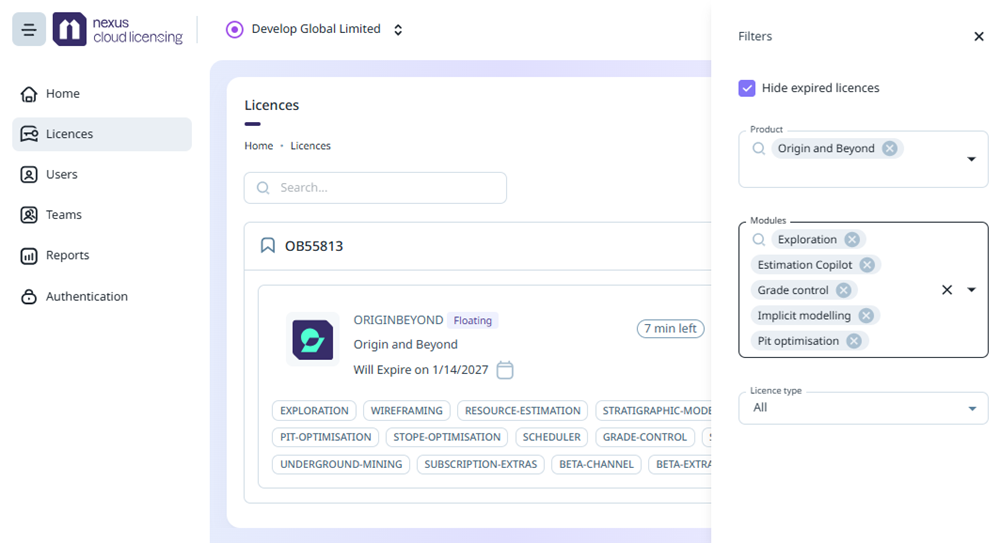
The Modules drop down list is enabled when only one Product is selected. The drop down is used to filter the list by specific modules. If you open the list and enter text, the list of available modules will be filtered to that text:
You can add Modules to the filter to limit the licence list to only those licences where the selected modules are included:
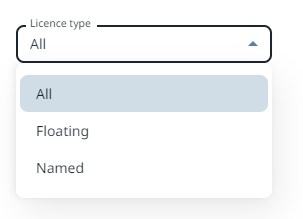
The Licence type drop down is used to limit the licences list to only the selected type:
If you select the View Details button for a licence in the list, the details of that licence are displayed:
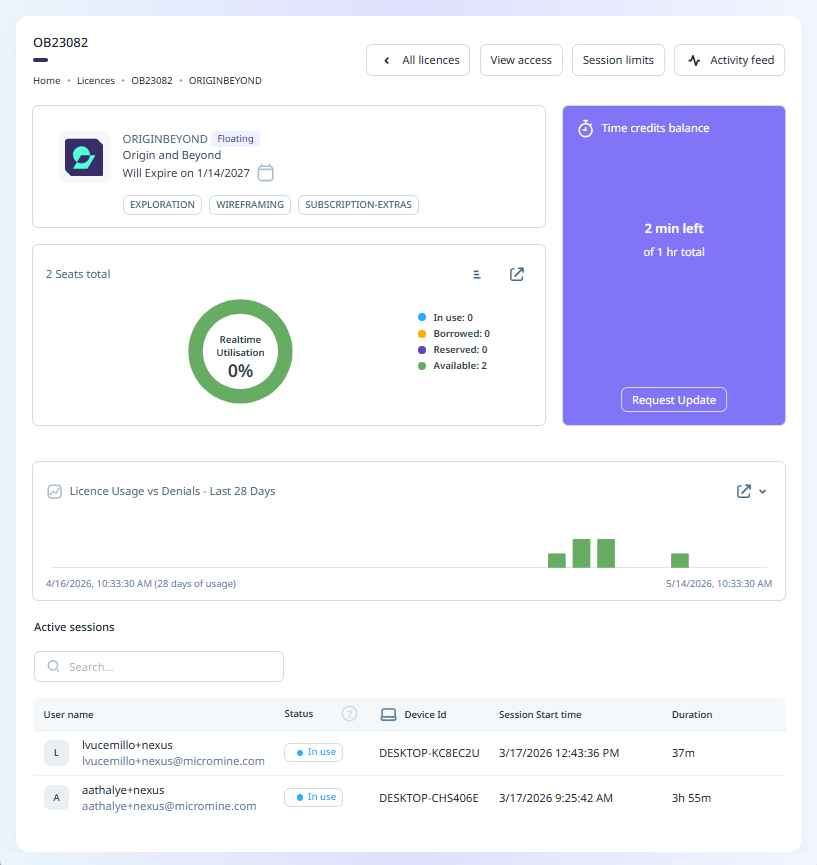
For Time Credits licences, the Time credits balance information is displayed in a panel on the right:
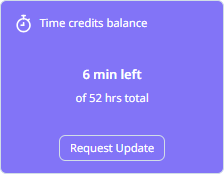
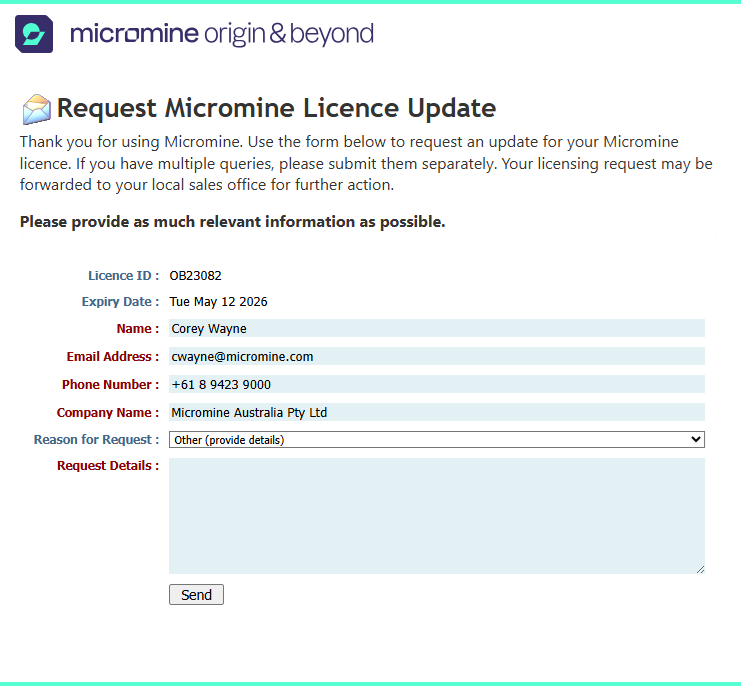
From the information in the panel, you can view the time left and total hours for your licence, as well as use the Request Update button to request more hours or an updated licence. The button, when activated, will open the Request Micromine Licence Update form that can be filled out and submitted:
Time credit licences cannot be borrowed unless they are a hybrid overallocation licence which contains assignable seats. In the Licence manager, overallocation licences will be displayed with the time credit balance and the available seats:

As soon as a seat is released, the consumption of time credits will be stopped and a seat can be assigned for use.
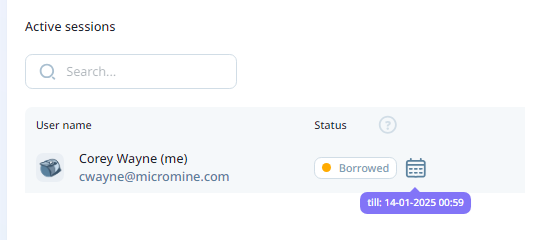
For Borrowed licences, the expiry date for the licence loan will be displayed if you hover on the calendar beside the status indicator:
The All Licences button at the top of the page will return you to the Licence page.
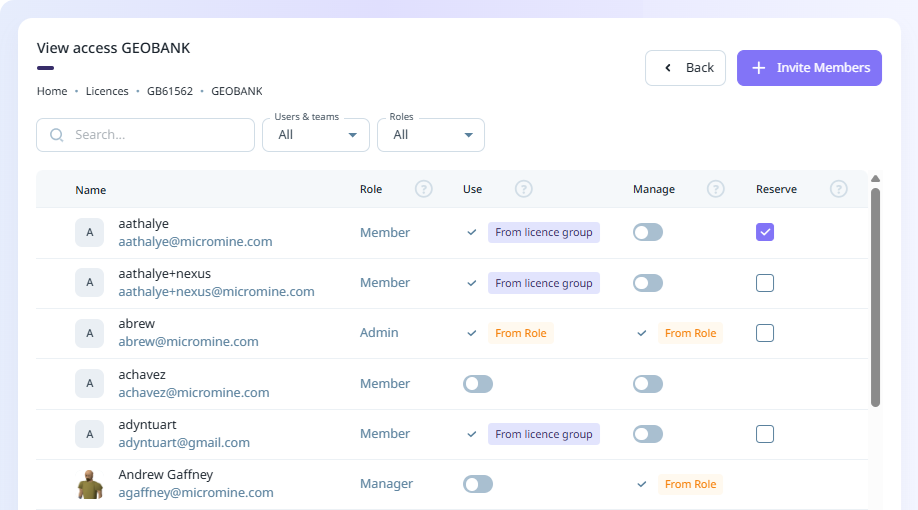
The View Access button opens the View Access page. Depending on the Licence type selected, the View Access page will contain the following information on each user:
-
Name - Includes the user name and email address.
-
Role - The assigned Role for the user. This information is read-only and can only be changed with the required permissions. For information on the available roles, see Users.
-
Use - Whether the user has Use permission for this licence. This option is only available for Floating licences.
Use permission allows a user to utilise (occupy a seat) on the licence.
-
Manage - Determines whether the user can manage user permissions for the licence.
Manage permission allows the user to administer user permission for the licence.
-
Reserve - For each user, you can select the Reserve check box to indicate that the user has reserved that licence seat. This is especially relevant to Floating licences where a user can reserve a seat - making it essentially a Named licence for that user.
Note: For users who are not Administrators, the View Admins button will be displayed instead. Clicking the View Admins button will open a list of the users with Admin role so that Admin access can be requested if required.

In the View Access window, if a User does not have a Member Use role, the Reserve option will not be displayed for them. Turning on Use will automatically display the Reserve option.
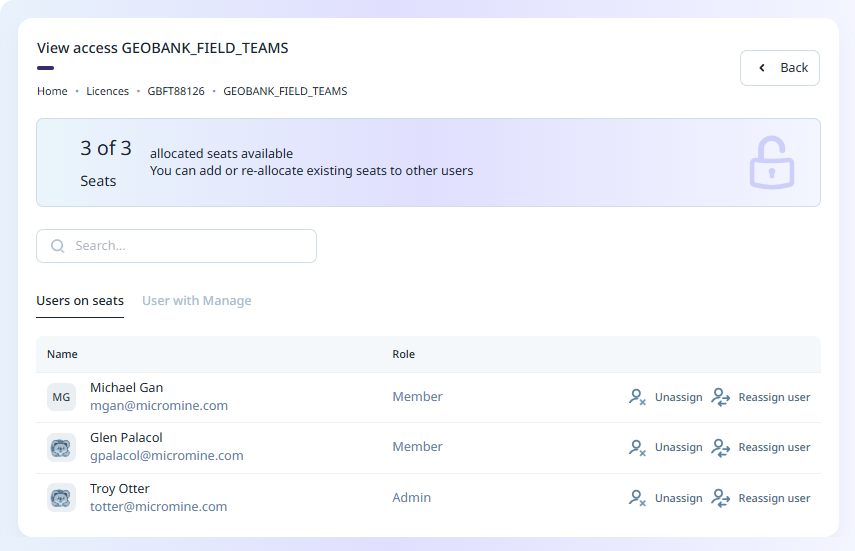
For a Named licence, the View access page will display the number of allocated seats available for the licence:
Users with the required permissions can edit the details of the group permissions using the toggles for Use and Manage.
The Session Limits button will open the Session Limits page, used to configure the Maximum session duration and Session grace period for the licence.

The Maximum session duration option, when enabled, provides a field in which you can specify the maximum time a user of the licence can remain in session. As outlined on the Settings page, when a time limit is reached, the session will be automatically ended and the seat will be released.
The Session grace period option is used to configure the length of time for which a user can continue with the licence after the network connection to Cloud Licensing has been lost. If the connection is not restored within the grace period, the session will end automatically and the seat will be released.
You can Save or Discard any changes you make to the Session settings using the buttons at the bottom right.
The Licence Usage vs Denials section of the Licence details page displays information on the usage for the licence over the previous 28 day period, as well as any Denials in the same time. This information is graphed separately in the History Usage Report and Denials Reports.
Hovering on a bar in the graph will display the date of the usage / denial and the number of users.

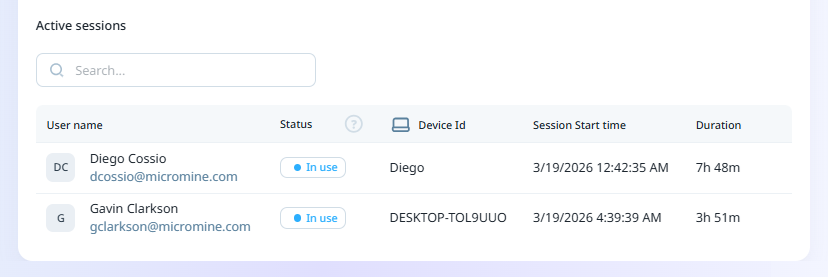
The Active sessions section of the Licence details page displays the In Use and Borrowed licence users. The following statistics for each user are displayed in the grid:
-
User name - The user name of the user for the licence seat.
-
Status - The current status of the user and licence seat.
If you click the question icon next to the Status label in the heading bar, an information panel describing the available statuses is displayed:
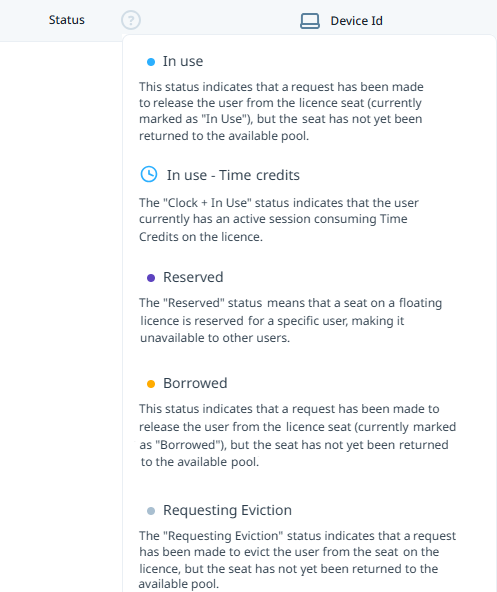
Note: The Reserved status is changed to In use when the User with a Reserved seat has an active session.
-
Device ID - The Device ID for the device currently being used with the licence for the user.
-
Session Start Time - The date and time at which the session for the current user begun.
-
Duration - The length of time for which the current session has been active.
You can search for a specific active session user or licence using the Search field.
The session owner, users with Manager or Admin role, and users with Manage permission on this licence will have access to the Evict button.
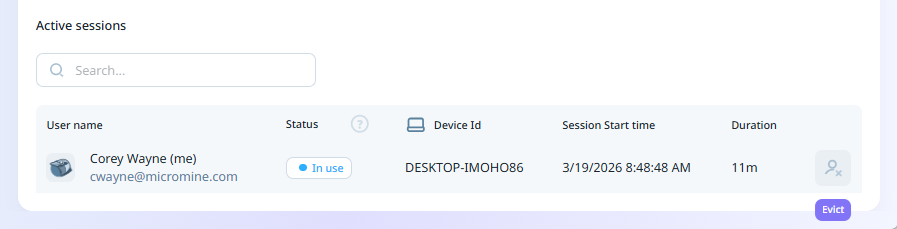
If you need to request that a user with an In Use licence signs out of all applications, or force a sign-out for idle or unreachable sessions, hover over the row for the user and click the Evict button:
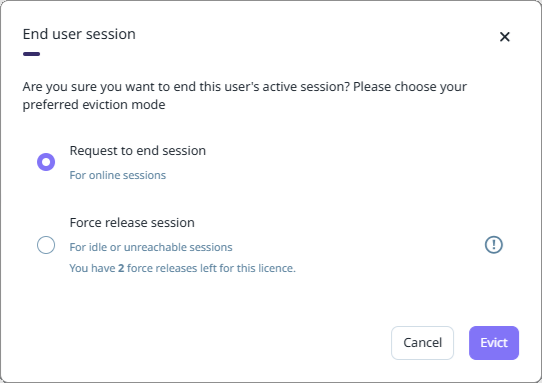
If you select the Request to end session option, the user session will be stopped and the user will be prompted in the application they are using. The status of the licence will be changed to Evicting.

From the prompt, the user can select whether to Continue or Terminate the session. For example, in Micromine Origin & Beyond, the following prompt will be displayed:
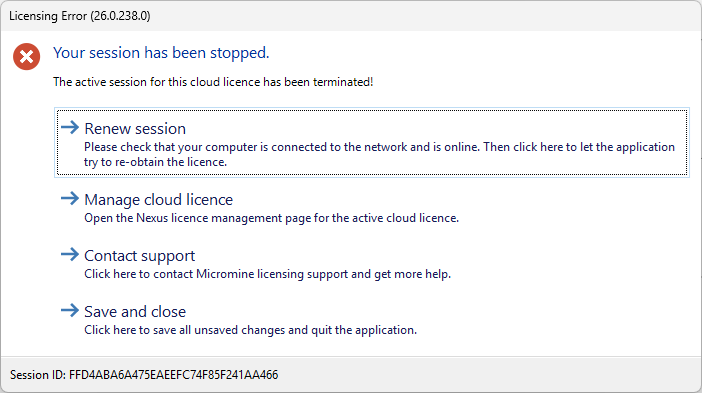
Upon selecting Renew session, the user session is renewed and the status of the licence in the Manage Licence page will return to In Use. If the user selects Terminate, the application for the current session will be shut down and the users session will be evicted and the licence will become available.
If you select the Force release session option, the user will be automatically removed from the licence session and prompted to save and close. This should only be used for idle or unreachable sessions, and there is a limit of two (2) force release sessions per 28 days.
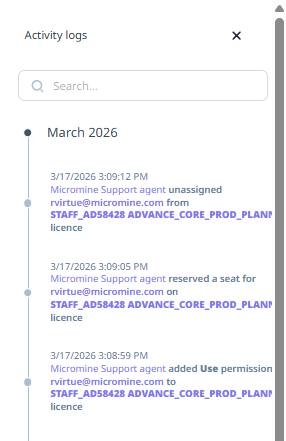
The Activity Feed button above the available seats information opens the Activity Logs panel for the licence; displaying the activity for the date range configured for Reports:
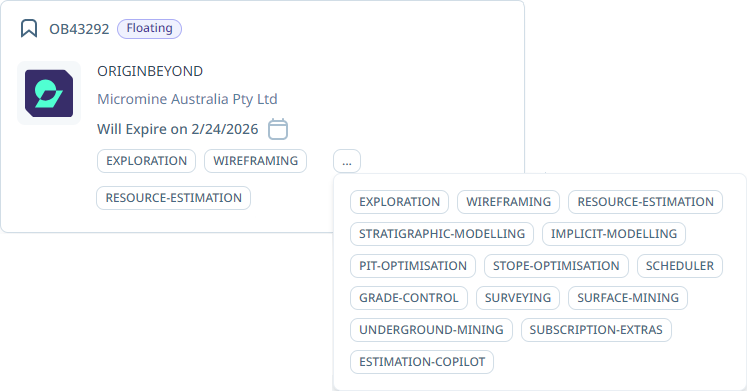
Information on the selected licence and some included modules is displayed in the top left panel of the Details page. If all the included modules cannot be displayed, you can click the ellipsis button to view the complete list of the modules for the licence:
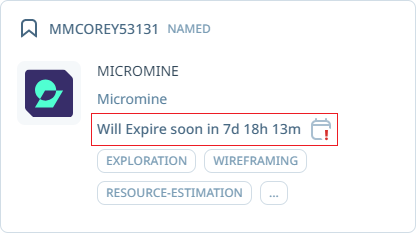
If a licence is close to expiry, an icon and a warning message will be displayed in the panel:
For Floating licences, the panel at the right displays information on the number of seats available for the selected licence, as well as a graph of statuses for each of the available seats:
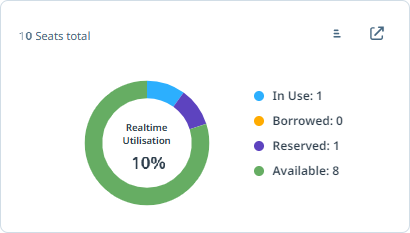
If you hover on a piece of the graph, the status information will be displayed in a pop up:
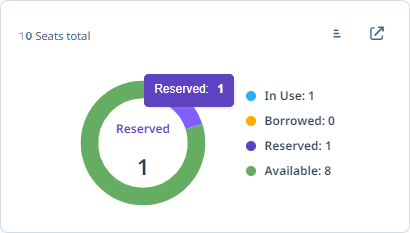
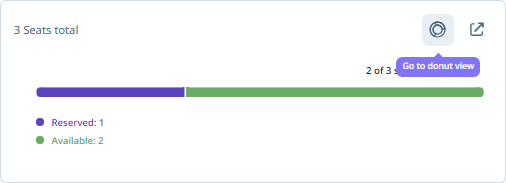
You can use the Chart type button at the top right of the panel to toggle between Scaled View and Donut View for the graph:
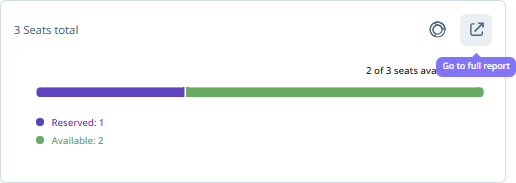
If you click the icon at the top right, you can view the Real-time Usage Report on the Reports page.
For Named licences, Donut view is not available and more status information is listed:
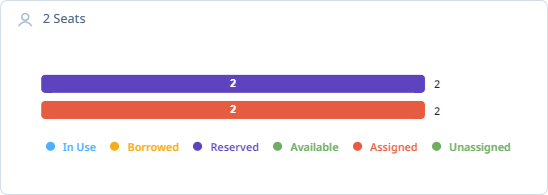
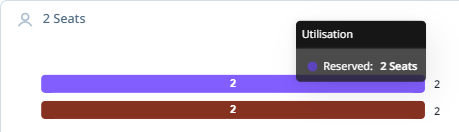
The Assigned and Unassigned status information is displayed in the licence information panel.
Assigned seats are licence seats that have been reserved for a user - i.e. a Named licence. Unassigned seats are available to be reserved for a User. If you hover on a bar in the licence information panel, a pop up is displayed:
To assign an available seat to a user who has already been invited to the company,
-
Click the Assign seat option for the available seat.
The Assign Users dialog is displayed.
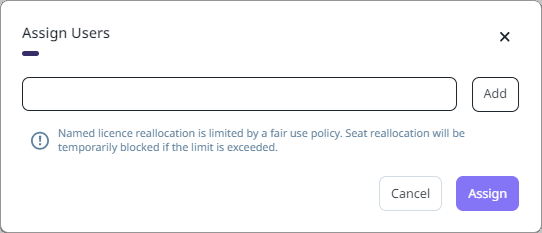
-
Enter the email for the user you want to assign to the available seat.
-
Click Add.
As long as the user has already been invited to the company, their email and user details will be displayed under the field:
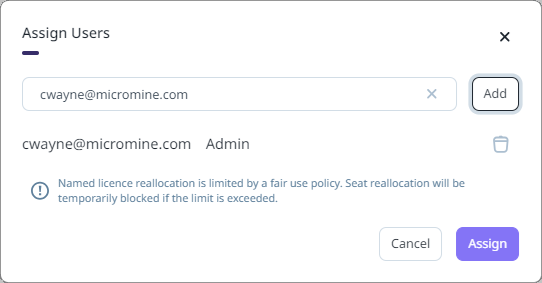
-
Click the Assign button to assign the selected user to the available seat.
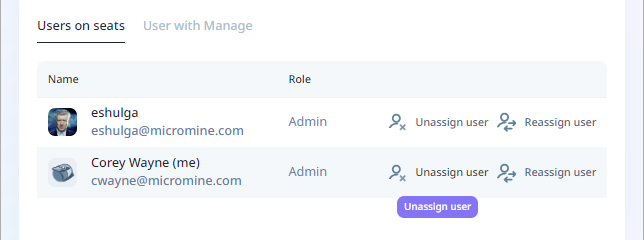
To unassign a Named licence assigned user from the View Access page:
-
Click the Unassign User option at the right of the user to be unassigned:
-
Click Confirm in the prompt:
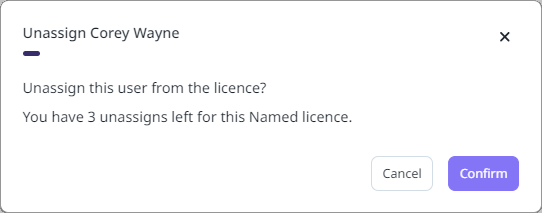
Note: The number of times you can unassign and reassign a user is limited. The remaining number of times you can unassign a user is displayed in the prompt.
All users must be online to use a cloud licence. If there is a connection error or failure, the user will have a grace period to complete their work. If network connection is restored before the end of the grace period, the user can seamlessly continue working in the application. If the connection is not restored, the seat is released back to the floating license pool, making it available for others. The user will receive a license error message and will need to close the application, with any changes saved.
Borrow Licence
For most applications, a Borrow function can be used to provide shorter-term access to the software offline. You will need to borrow the licence while you have internet access before you can then use the licence offline.
The borrow period is defined in the Borrow Licence wizard and cannot exceed the maximum period specified in the licence itself. At the end of the borrow period, the seat will be released back to the license pool.
Invite Users
The Invite Members button is displayed on the View Access page for the Manager and Admin user roles. The button opens a form for inviting users as Members via their email address:
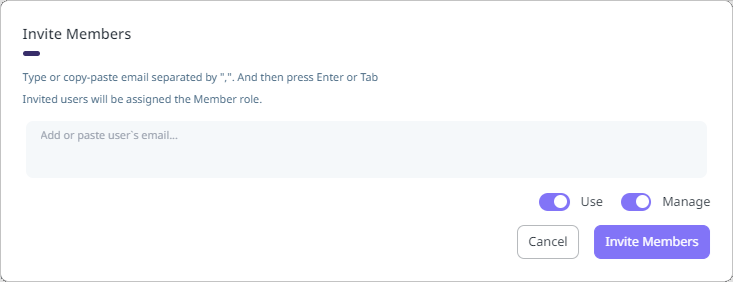
As outlined in the form, users invited here will be assigned the Member role. You can update the role at a later time.
For the emails entered in the invite, you can toggle On or Off the Use and/or Manage permissions. These permissions can be updated by an Admin at any time.
The available Roles for users with permission to use or manage a licence are as follows:
-
Member - The Member role does not provide access to use or manage any licences by default. However, Use or Manage permissions can be granted for specific licences as required. Member roles can be granted different combinations of Manage and User permissions for specific purposes - such as providing Licence Administrator functions with Member + Manage permission.
-
Full User - The Full User role provides access to use all company licences, excluding Named licences. By default, a Full User does not have permission to manage any licences, but Manage permission can be granted for specific licences if needed.
-
Manager - The Manager role allows a user to manage all company users and licences, invite/delete users, create user teams, and assign permissions for each licence; however, it does not grant access to use all licences by default.
-
Admin - The Admin role enables management of all company users and licences and grants and grants access to use all licences by default, with the exception of Named licences.
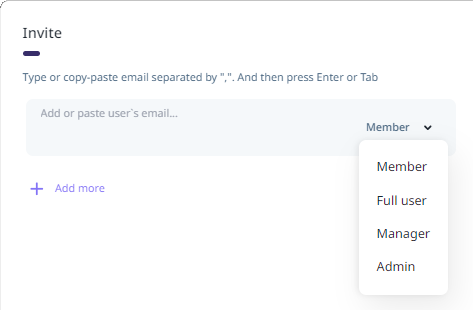
Alternatively, you can use the Invite form, opened from the button on the Users page to select the relevant Role for each invite.
You can manage users on the Nexus Home Users page. See: Users