Provisioning
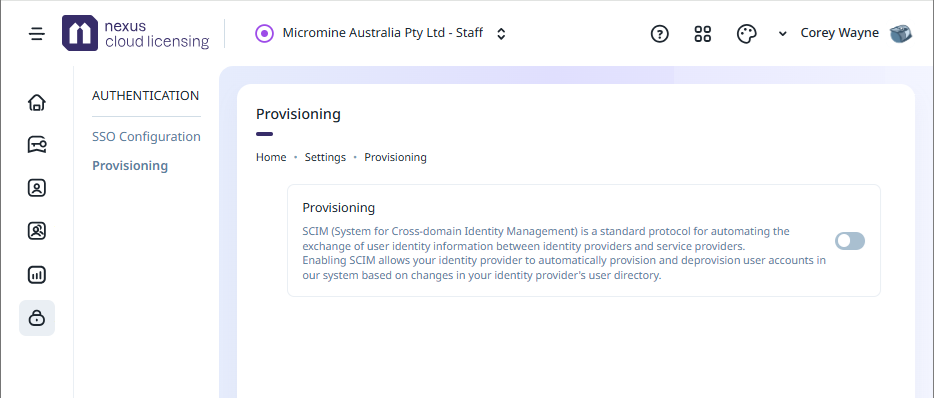
The Provisioning tab on the Authentication page provides an option to enable SCIM (System for Cross-domain Identity Management) Provisioning:
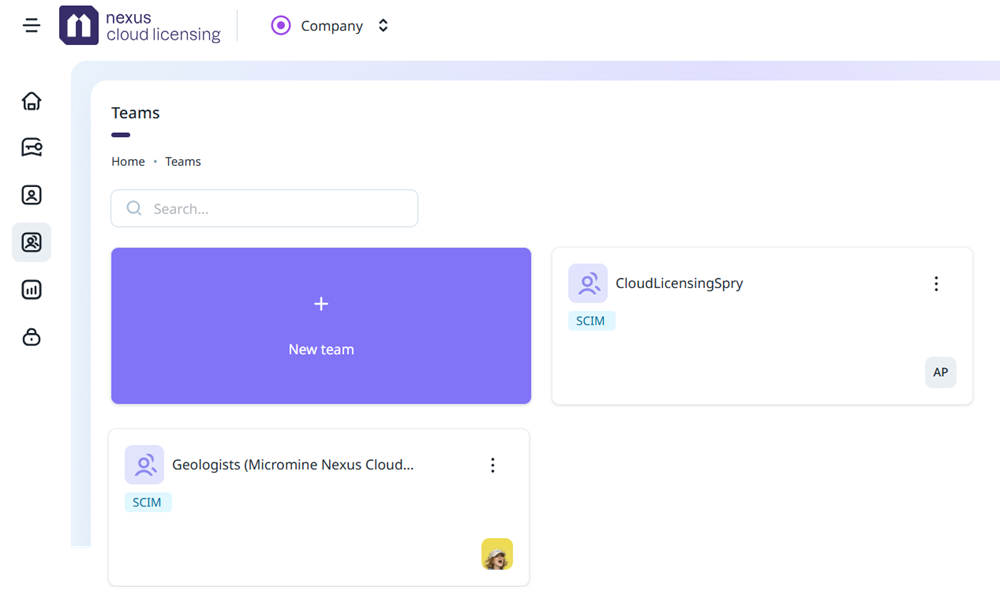
You can configure your company account in Micromine Nexus Cloud Licensing so that users and user groups are provisioned and deprovisioned by an external identity provider (IdP) such as Okta, Microsoft Entra ID or JumpCloud, using the System for Cross-domain Identity Management (SCIM) protocol.
-
Provisioning - the identity provider pushes users and user groups to Micromine Nexus Cloud Licensing.
-
Deprovisioning - the identity provider instructs Micromine Nexus Cloud Licensing to remove users and groups from a company account.
Configure SCIM provisioning with Microsoft Entra ID
The following describes how to configure SCIM provisioning between Microsoft Entra ID and Micromine Nexus Cloud Licensing (Nexus Cloud Licensing).
Configuration is completed in two stages:
-
Collect the SCIM URL and token from Nexus Cloud Licensing; then,
-
Use the URL and token to set up provisioning in Microsoft Entra ID.
Before you begin
Ensure,
-
You can sign in to Nexus Cloud Licensing as an administrator of your company account.
-
You have permission in Microsoft Entra ID to create and configure enterprise applications.
Get the SCIM URL and SCIM token
To enable SCIM provisioning in Nexus Cloud Licensing, from the Authentication page on the Provisioning tab,
-
Set the Provisioning option to ON so that your identity provider can provision and deprovision users and groups for your company, and,
-
Click Save Changes in the prompt.

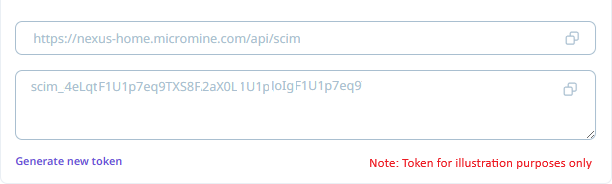
The Provisioning page will display the URL and the SCIM token
-
Select the Copy icon to copy the SCIM URL and the SCIM token.. You use both values when you configure provisioning in Microsoft Entra ID.
Important: Save both these values for later steps in this process.Note: The SCIM token grants access to your company account. Store it securely and do not share it. If it is exposed, Generate a new token and update the configuration in Microsoft Entra ID.
Configure SCIM provisioning in Microsoft Entra ID
The following steps should be completed in the Azure portal.
-
Sign in to the Azure portal.
-
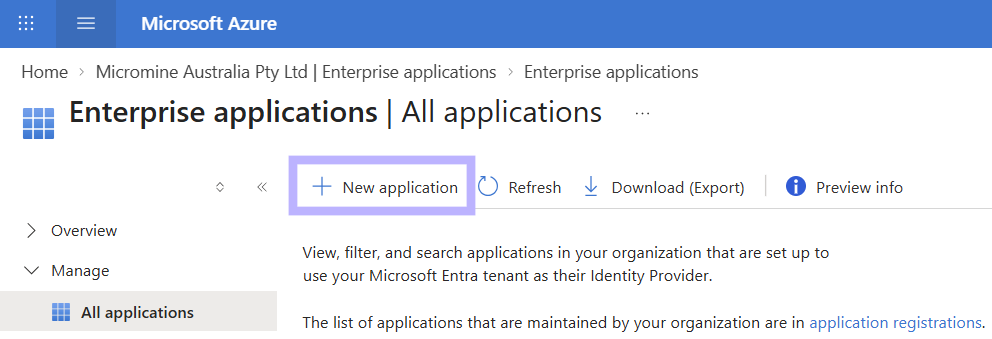
Go to Microsoft Entra ID > Enterprise applications, and then select + New application.
-
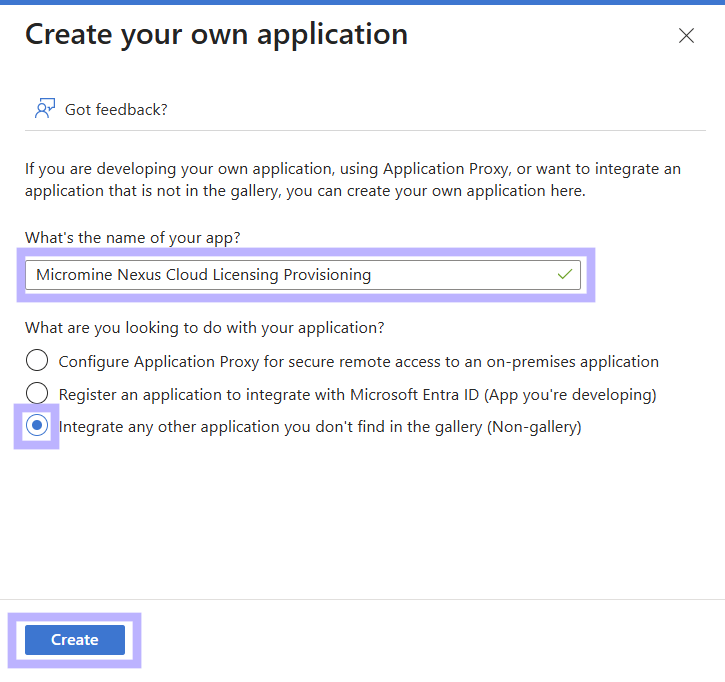
Select + Create your own application.
From the panel at the right,
-
Enter a unique name for the application, for example Micromine Nexus Cloud Licensing Provisioning
-
Select Integrate any other application you don’t find in the gallery (Non-gallery), and then,
-
Select Create.
In the new enterprise application,
-
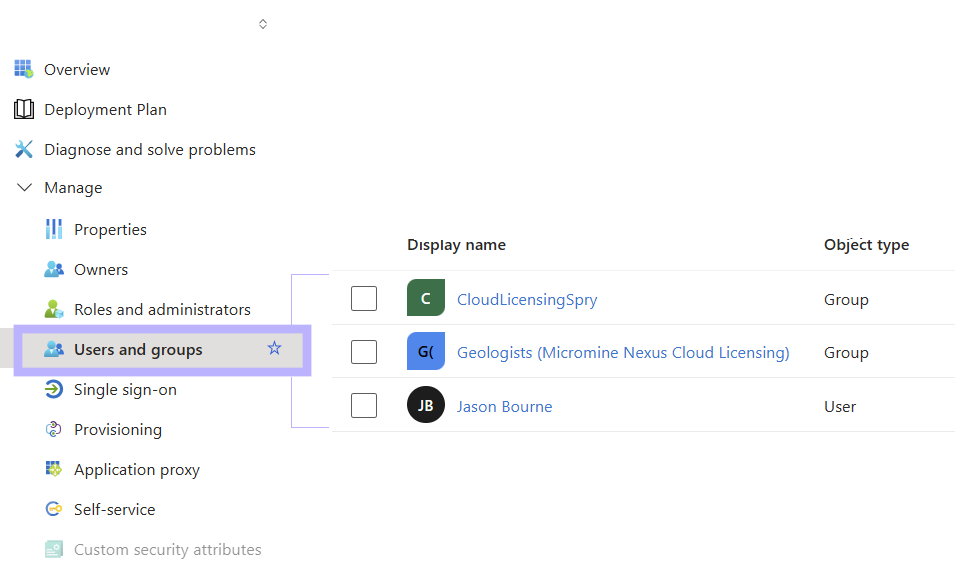
Go to Users and groups and add the users and groups that you want to provision to Nexus Cloud Licensing.
-
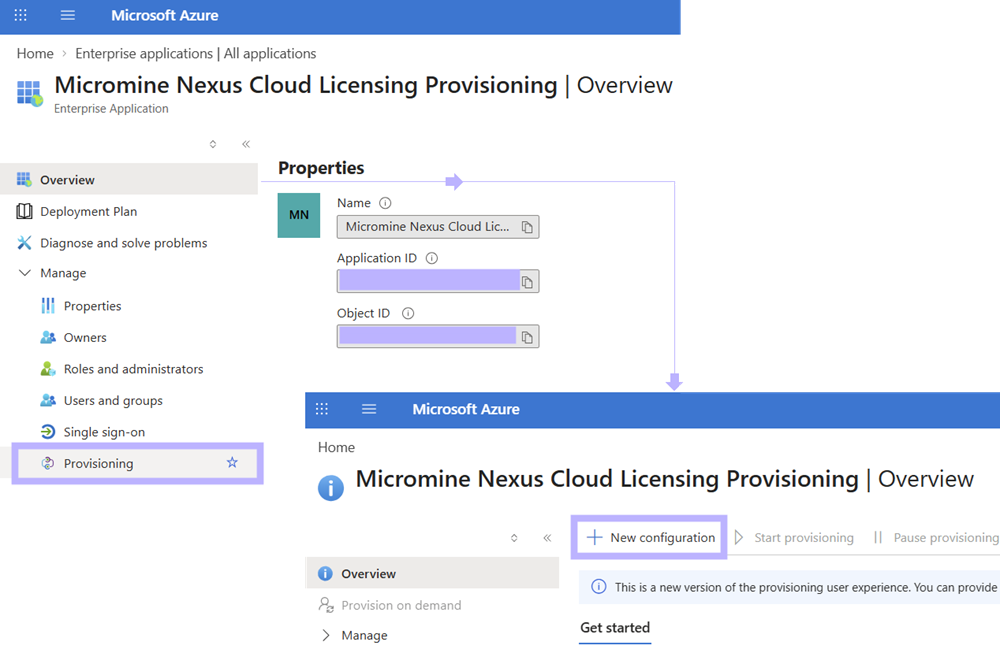
Go to Provisioning > Overview, and then,
-
Select New configuration.
-
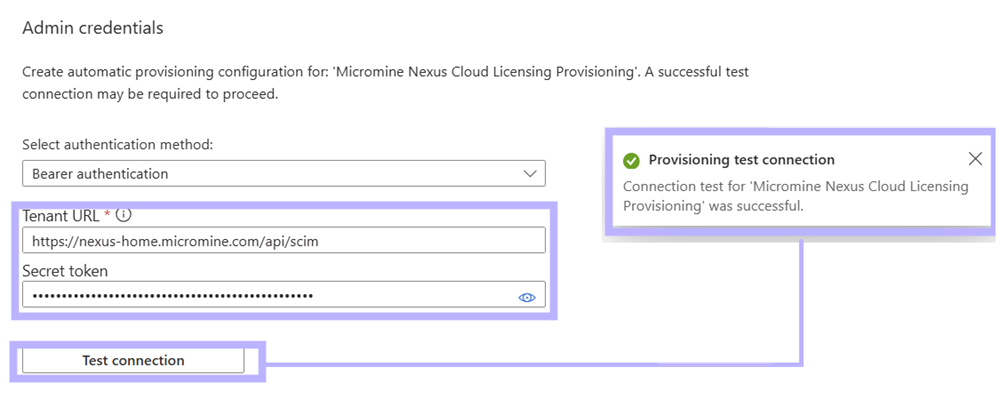
Set the following fields:
-
Select Test Connection to confirm that Microsoft Entra ID can reach Nexus Cloud Licensing:
-
Select Create at the bottom left of the window to save the configuration.
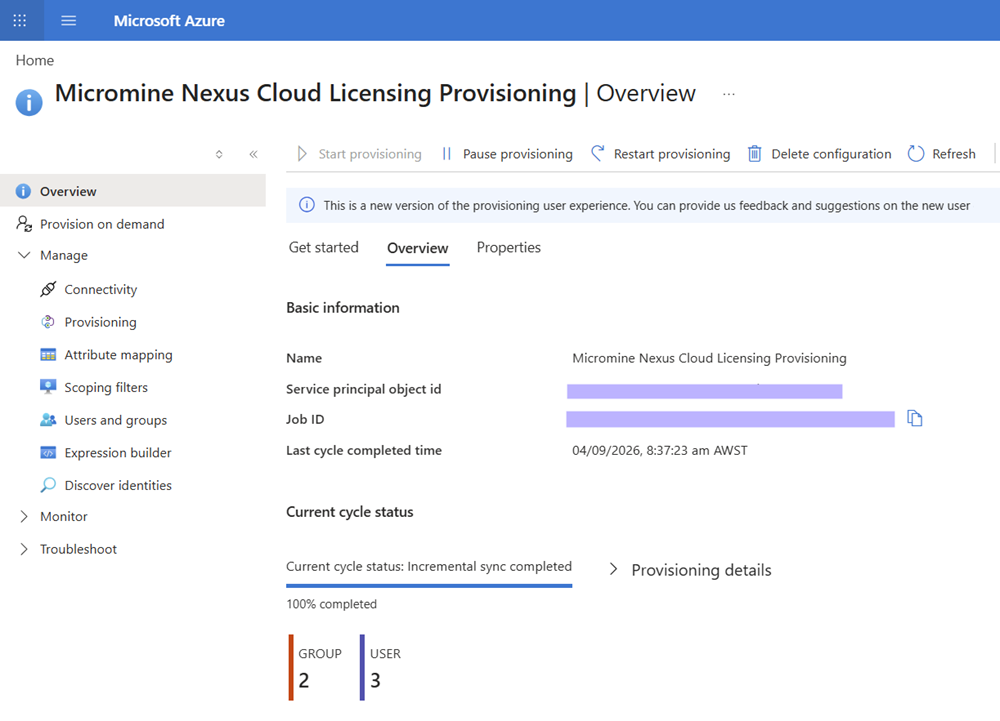
On the Overview page,
-
Select Start provisioning, then,
-
Select Yes in the confirmation dialog.
Microsoft Entra ID begins provisioning and deprovisioning users and groups in Nexus Cloud Licensing.
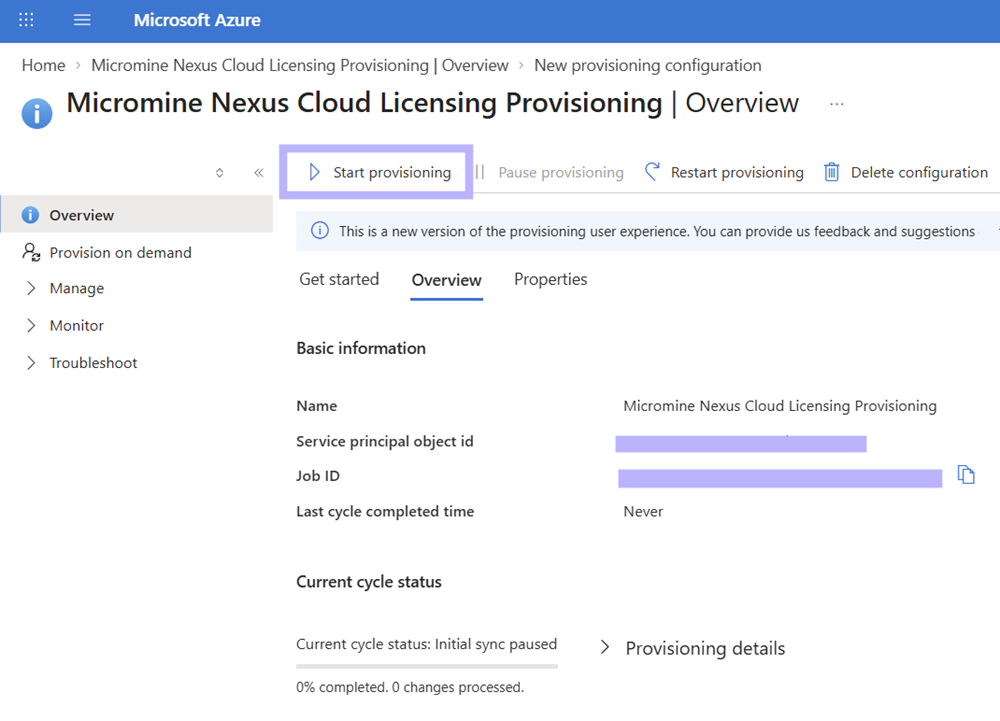
Note: The initial provisioning cycle usually starts immediately, but the duration of the cycle depends on the number of users and groups in scope. After that, Microsoft Entra ID runs an incremental cycle approximately every 40 minutes, so later changes in Microsoft Entra ID can take up to that long to appear in Nexus Cloud Licensing. You do not have to wait for the next cycle:
-
To run a cycle for everyone in scope, select Pause provisioning and then Start provisioning. Avoid Restart provisioning since it re-evaluates every user and group instead of only the changes since the last cycle.
-
Confirm that synchronisation succeeded.
The Azure portal reports the number of synchronised users and groups, with no errors or warnings, and the same users and groups appear in Nexus Cloud Licensing.