

Manage
Task categories are used to classify tasks. Categories can be defined for any useful purpose. Each task within the schedule has a core Task Category attribute for which the value can be set to one of the defined categories.
Prior to v2021, which introduced support for configurable grouping of tasks based on values from any attribute or expression, task categories provided the only means of grouping tasks within the Gantt Chart and were known as “task groups”. Although their role is less important now, they can still be useful and have been retained for compatibility with previous releases.

Task Categories
The Task Categories grid list lists the task categories that have been defined for the schedule.
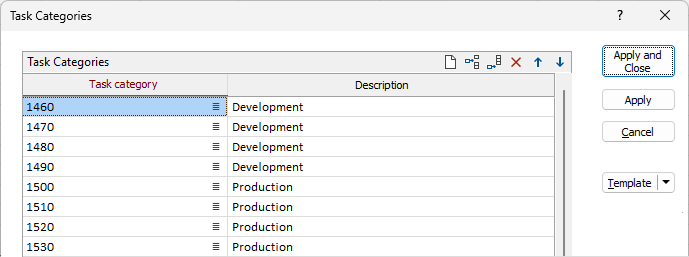
Use the icon buttons on the top right of the grid list to add, delete and clear items in the list.
Enter the following details for each task category:
Task Category
Enter the name for the task category.
Right click in the field to display the pop-up menu and select the appropriate option:
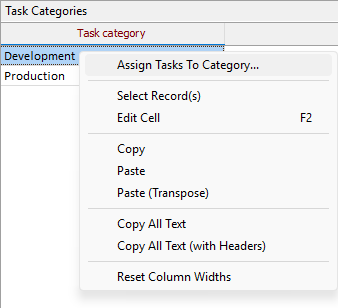
Assign Tasks to Category
To assign tasks to the category, select Assign Tasks To Category… from the pop-up menu.
This is equivalent to using the Schedule | Categories | Assign Tasks option with Tasks > Filter By preselected.
Description
Enter a description of, or useful notes pertaining to, the task category.
Apply and Close
Click Apply and Close to save the changes and close the form. The updated list will be made available to the schedule.
Apply
Click Apply to save the changes to the attributes with the form open. The updated list will be made available to the schedule.
Cancel
If you click the Cancel button, the form will be closed without saving or applying any changes.
Note: Any changes you have made and applied with the Apply button will not be undone if you cancel the form.
Units
Click Units to configure the types of units that can be assigned to attributes within the current schedule.
For information on configuring the unit types defined for the schedule, see Units.
Template
The Template button is only available for Template Forms. Template Forms inherit saved or previously used values.
Click the Template button to select and open a saved form set template.
Load Template
Click the Load Template button to select and open a saved template to populate the fields of the form.
Save Template
Click the Save Template button to save the details of the current form as a template that can be loaded at a later time.
Manage
Click the Manage button to open the Template Forms manager which can be used to open, save, delete, import and export the template forms for your project.
Undo and Redo
Click Undo (CTRL + Z) to undo recent changes in the form. After an Undo, click Redo (CTRL + Y) to restore the last change that was undone.
Collapse
Collapse (roll-up) the form to preview a chart, or preview the results of an operation in Vizex, or obtain input values from Vizex, the Property Window, the File Editor, or the Plot Editor.