

Drillholes

The same option is available on the Drillhole tab, in the Database group.
Input Files
The Input Files tab of the Import Drillholes form is used to select the collar, survey, interval and event files to be imported. Supported files and databases for import include Text(.csv, .tab, .txt), Excel Worksheets (.xlsx, .xlsm, .xlsb, .xls) and ODBC and Access databases (DSN, .mdb, .accdb). As outlined on the Input Files tab, when files are selected, suggested file types and fields will be automatically populated.
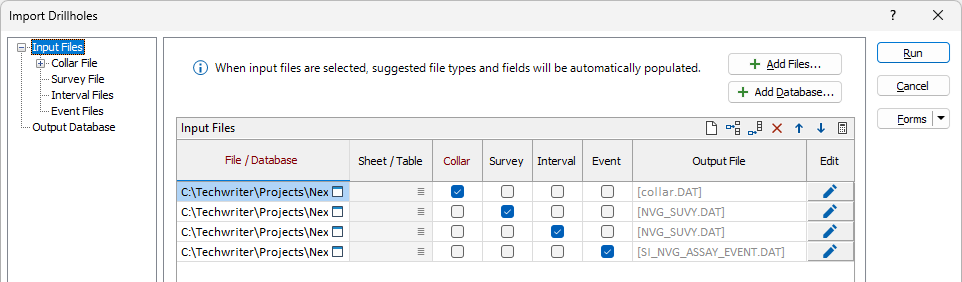
Use the buttons on the local toolbar to Manage the rows in the list.
Note: Autofill is not supported when using replaceable macro information (e.g. “%1”). The Import Drillhole tool can still be manually filled and run using replaceable macros.
Add Files
Use the Add Files button to open Explorer and select each file for the import. At minimum, the Collar file is required. You can also add Survey, Interval and Event files to the Input Files grid. Multiple files can be selected for inclusion from Explorer.
Files you add will be listed in the grid in separate rows with the name and location of the file displayed in the File field.
If you use the File / Database field in the Input Files grid to add a file, you will be prompted to select the input file format first:
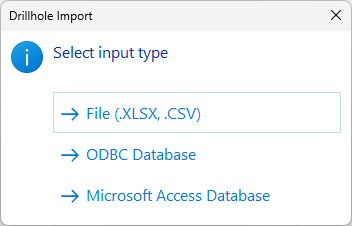
You can select the required input type from the prompt and open Explorer to specify the input file.
Note: MS Access and ODBC links will always be sorted based on Hole Name and From, regardless of any Sort by Hole and Depth options set on the Output Database tab.
Add Database
If you click the Add Database button, you will be prompted to select the database type to be added to the import:
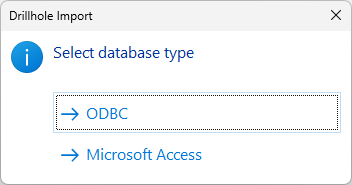
When you select the required option, Explorer will open and you can specify the database to use. Once selected, you will be prompted to select the required table/s:
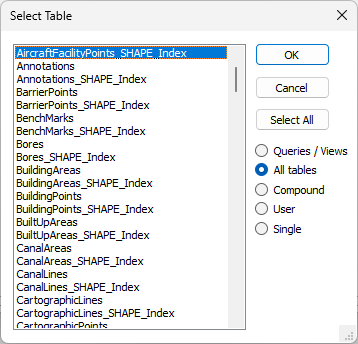
In the Select Table dialog, use the radio buttons to control which tables will appear:
| Queries/Views | Displays any SQL queries or views in the selected database/file. |
| All Tables | Displays all the tables/sheets in the selected database/file. |
| Compound | Only the following tables will be displayed in the selection list: SYSVIEWAssay, SYSVIEWCollar; SYSVIEWGeoChem; SYSVIEWGeology and SYSVIEWSurvey. The SYSVIEW prefix will not appear. |
| User | Displays only those tables that have a name starting with "USER". The USER prefix itself will not be displayed in the selection list. |
| Single |
Displays all tables except those starting with any of the following words: Meta, USER or SYSVIEW. |
You can multi-select the table/s and/or SQL queries/views you want to use, and click OK. Alternatively, to select all tables, click Select All.
Sheet
Use the Sheet field list button to select the sheet from the file which contains the information required for import. If there is only one sheet in the file, the Sheet selection is not required. The sheet name will be appended to the default Output name.
Collar, Survey, Interval, Event
Using the check boxes for each file, you can mark the file as the appropriate information - Collar, Survey, Interval or Event.
Output Name
The Output Name field is automatically populated with the name of the output field for each file in the grid. You can enter a custom name for the output field if required.
The Auto calculate grid button in the toolbar will calculate the relevant file type and select the corresponding check box for each file, where available.
Edit
The Edit button for each file in the grid opens the Edit DHDB Input File form for the selected file:
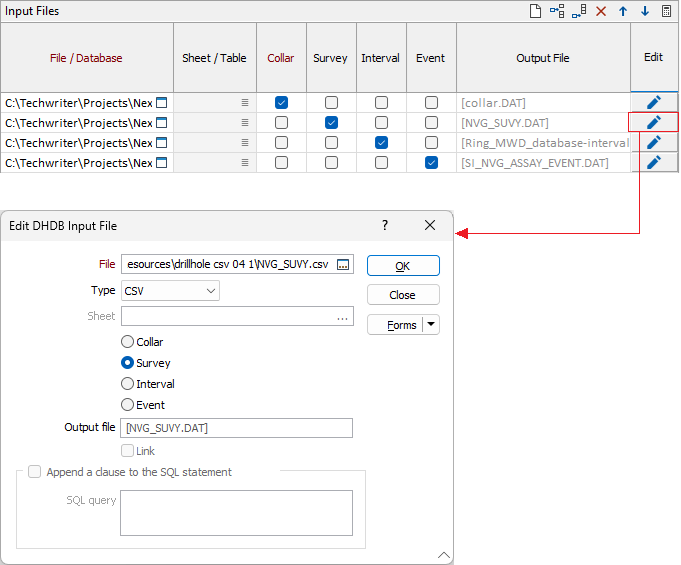
You can select an alternate File from the field provided, set the file type to Collar, Survey, Interval or Event, as well as enter a custom name for the Output file.
When an ODBC or MS Access file type is selected, you can select to Create link file for the specified Output.
When an ODBC type file is selected, you can also choose to Append a clause to the SQL statement and enter the clause in the SQL query field. Any clause you enter will be appended to the standard SQL clause: SELECT * FROM [tablename] Some examples of clauses you might want to append include:
-
ORDER BY “HOLE_ID”, “FROM" -
WHERE “DEPOSIT” = “Olympic_Dam”
Use the Collar File tab to enter the details of the collar file for the import.
Run
To begin the import process, click the Run button. If the specified output file already exists, you will be given the option of overwriting the file, or appending data to the file.