

Setup XYZ Tile Services Image

Setting up an XYZ tile services image defines the geographic layer(s) and the area of interest to be processed. The result of these requests is one or more map images geo-registered in the Pseudo Mercator coordinate system (EPSG: 3857). The images are saved with a .mmxyz file extension.
The XYZ format provides additional information to the WMTS standards, including PNG images for tiles provided through an API via URL where Z is the zoom level, and X and Y identify the tile.
Examples of XYZ tile-based map image servers include OpenStreetMap, MapBox and MapQuest. Note: To connect to servers that are not open source, you will need to acquire a valid licence for usage.
You can reload the files without connecting to the server, however you must be online to view the images. Once loaded, the images can be treated like any other, including draping onto a wireframe if the coordinate systems match.
You will probably need to convert the image registration from the Pseudo Mercator coordinate system (EPSG: 3857) to the coordinate system that your Project data is stored in.
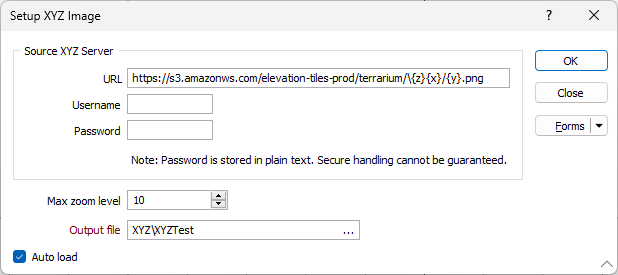
Source XYZServer
URL
The Tile Image Server is invoked using a standard web browser URL to submit a service request.
The content of the URL will depend on the operation requested: the information to show on the map, the area of interest, and the coordinate reference system.
A Username and Password may or may not be required to access the server. Note that the password is stored as plain text. Secure handling cannot be guaranteed.
Max Zoom Level
Set the maximum zoom level for the tile image. This will set a limit on the zoom level to prevent the need to redraw with new tiles. For example, if you set the maximum zoom level to 5, the image can be zoomed to level 5 before the tiles change.
Output file
Enter (or click on the ellipsis to select) the name of the output (*.mmxyz) file.
Auto load
To display the image in Vizex once the file has been created, select the Auto load option. (You can also drag and drop to load an image file into Vizex from the File Explorer.)
Forms
Click the Forms button to select and open a saved form set, or if a form set has been loaded, save the current form set
OK
When you have entered the URL for the XYZ server, set the properties maximum zoom level for the image, and specified an output file, click OK to create and (optionally) load the image.